
How to Make Cricut DIY Mother’s Day Popup Cards
Publish Date:
April 21, 2021
Author:
By Crafting Spree
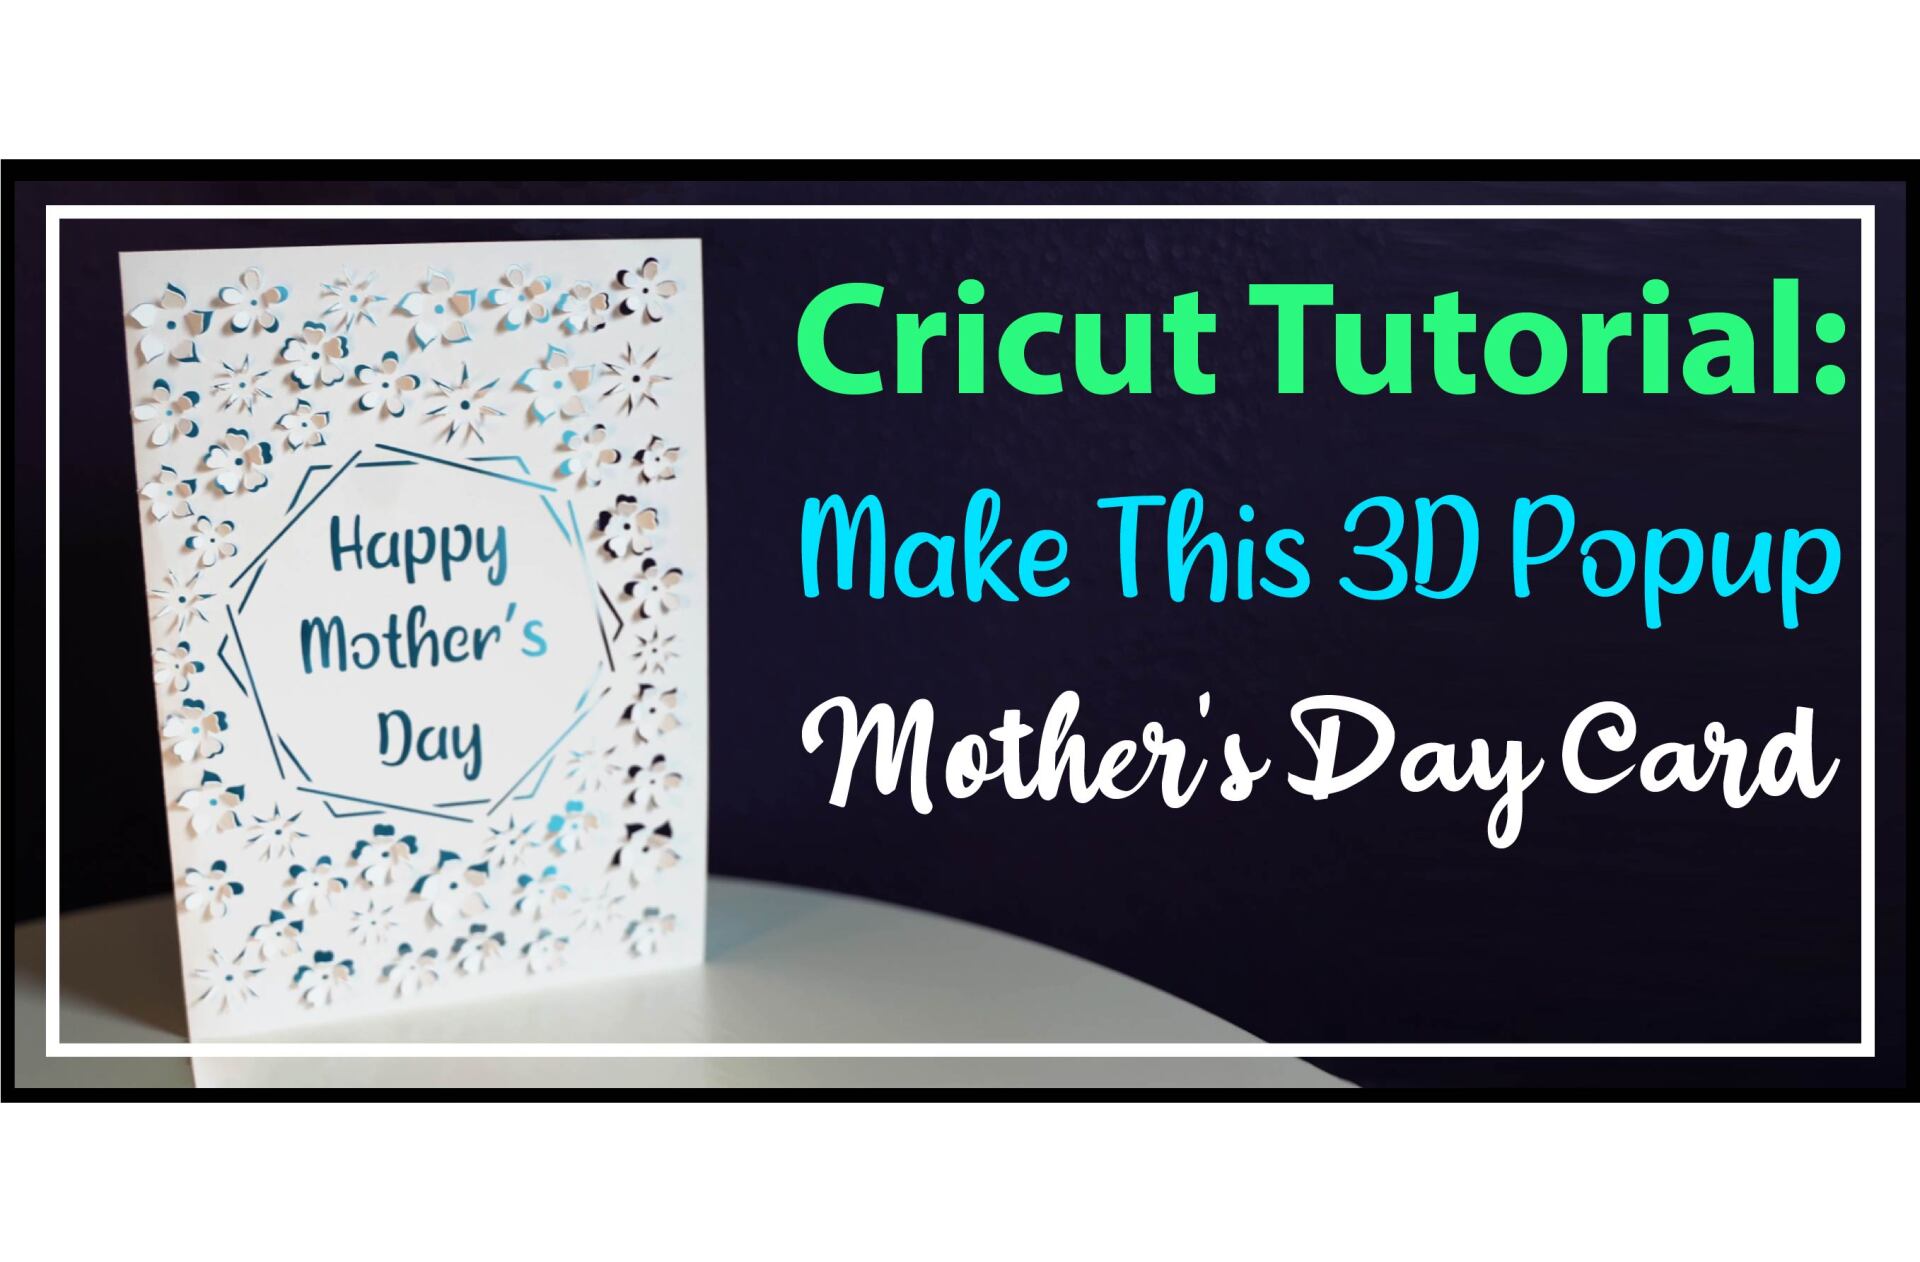
Looking to DIY some advanced-looking 3D popup cards with your Cricut for Mother’s Day this year? Then you’ve come to the right place! Get high quality professional-looking results with no prior knowledge required! I’ll walk you through step by step on how to transform a simple piece of cardstock paper into this gorgeously intricate 3D popup card that’s sure to wow your mom this Mother’s Day:
You can also check out our latest free SVG blog for a bunch of awesome Free Mother's Day SVGs and if you're looking for even more DIY Mother's Day gift ideas, check out our Ultimate Guide to Easy Cricut DIY Mother’s Day Gift Ideas and see if there's anything that looks perfect for your mom this Mother's Day!
Follow the video tutorial below
-OR-
continue scrolling for the written tutorial!
Supplies
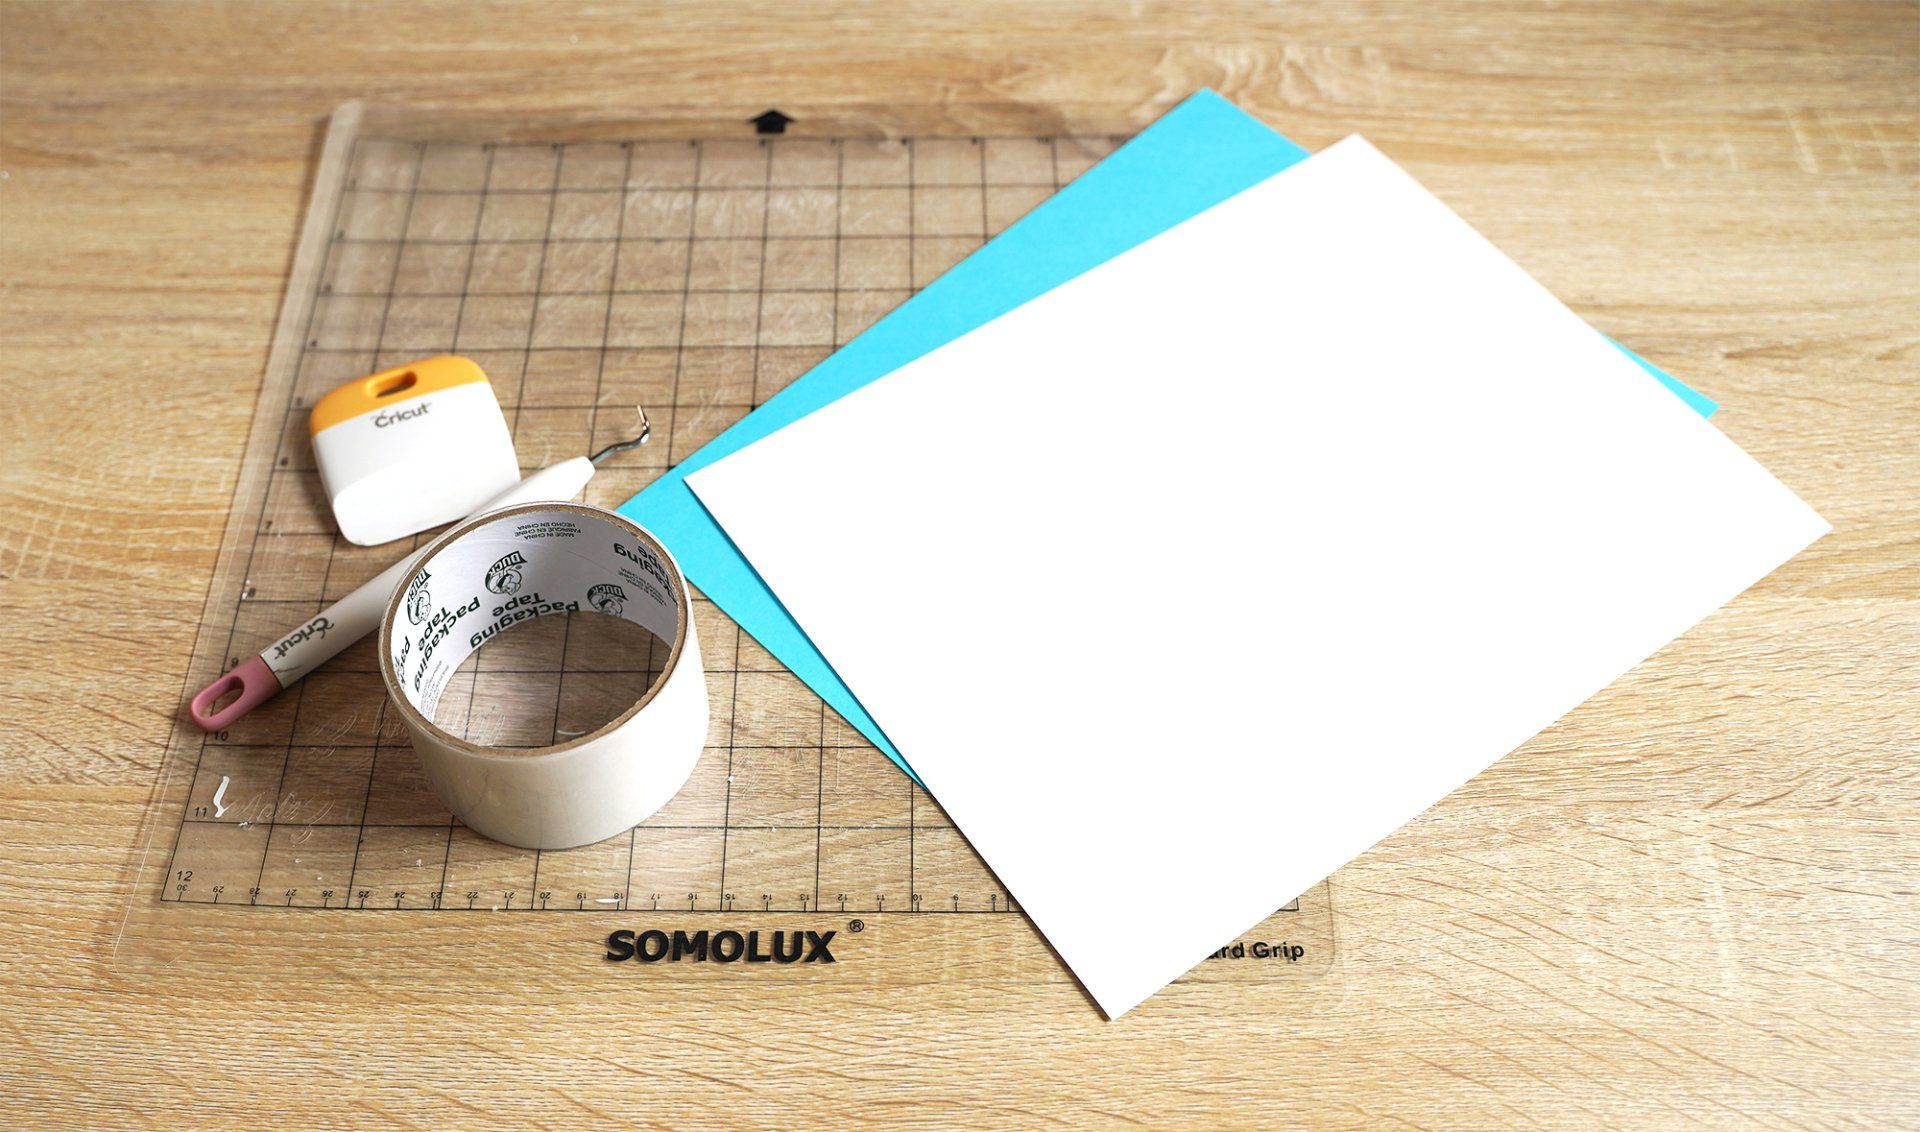
For this project you will need:
- Cricut Machine (Explore Air 1 or 2, or the Maker)
- Blade & Housing
(I buy this brand of
off brand replacement blades and I got a set of 30 deep cut replacement blades for about 94% less the cost of Cricut brand blades)
The fine point blade says it can cut cardstock but I’ve had it give me grief before so I switched to the deep cut blade and it’s worked like a charm every time but ultimately it’s up to you!
- Standard Grip Mat (I buy these off brand grip mats for around 50% the cost of Cricut mats)
- 1 Piece of 8.5” x 11” cardstock (I buy mine by the ream at Walmart, great price!)
- Weeding Tool (This is the weeding tool set I have and I love it cuz it was cheap AND aesthetic! (and came with a case))
If you don't have any weeding tools, you could also use something of-the-likes for this project, like a toothpick or straightened paper clip- we will use this to pop the petals out from the back so it just needs to be long, skinny, and rigid
- Scraper
(I have these
small scrapers but I'll probably be buying the
XL scraper soon because it's also a great price and seems worth it for another great time-saver)
The scraper tool is definitely optional but a HUGE time and headache-saver!
OPTIONAL:
- 1 Piece of 8.5” x 11” colored cardstock (I buy this pack of colored cardstock because it seems to always be on a great sale and is SUPER awesome, I love how many different colors it comes with)
This is for if if you want to add a colored insert inside like I did, for that extra pop of color. Completely up to you to add this or not, the card also looks very elegant and gorgeous in all white as well!
- Tape, Double-Sided Tape, Or Glue (Walmart and dollar tree are my go-to places for double-sided tape!)
we will use this to attach the colored cardstock insert inside the card. I prefer double-sided tape but had run out before making this card and all I had was packing tape and that worked too! Use what you've got, am I right!?
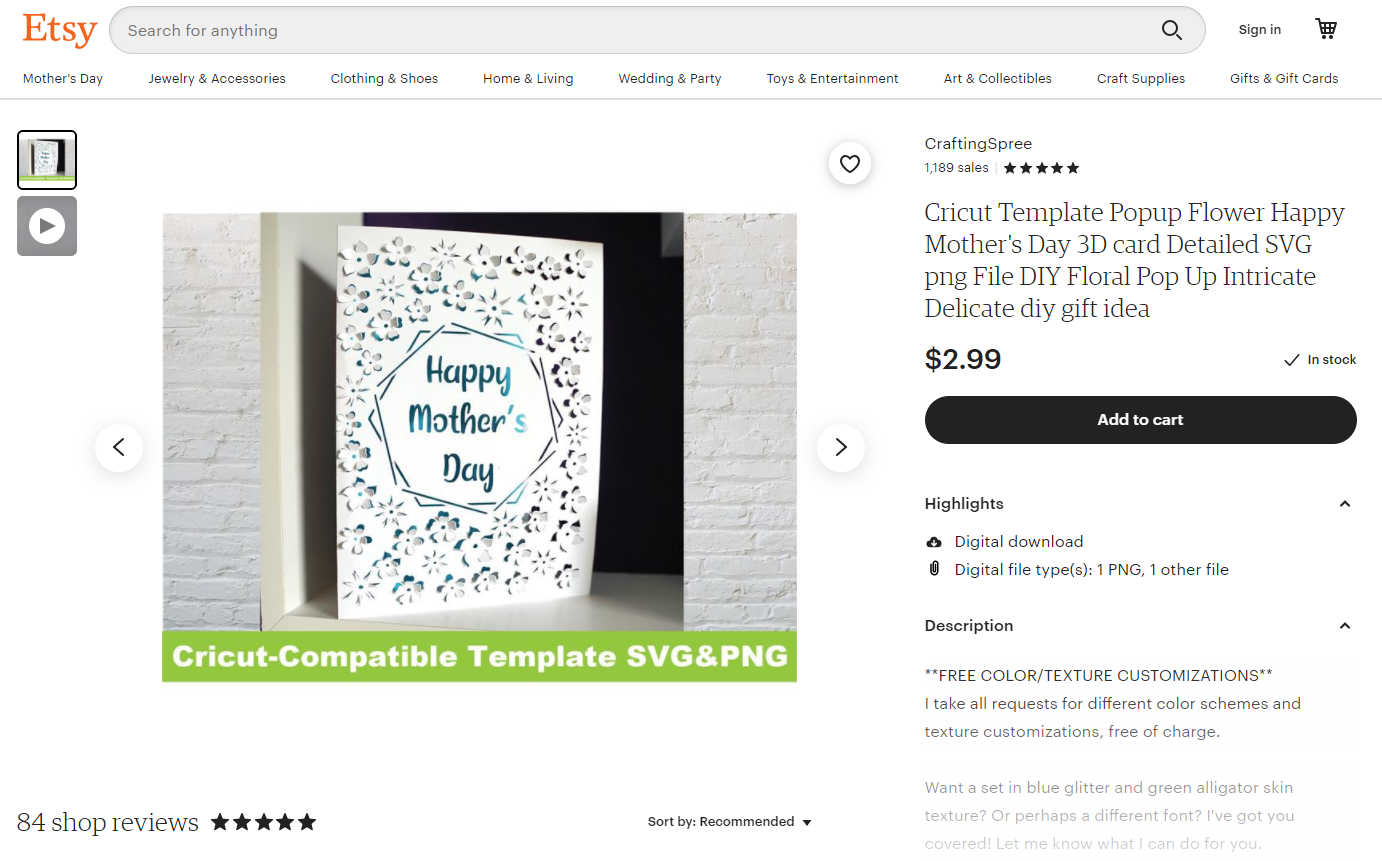
Step 1: Download the SVG
You can get the template I used on Etsy. Once you’ve purchased it you can immediately download it without any wait time!
LINK TO SVG: https://www.etsy.com/listing/1004883197/cricut-template-popup-flower-happy?ref=shop_home_active_1&crt=1
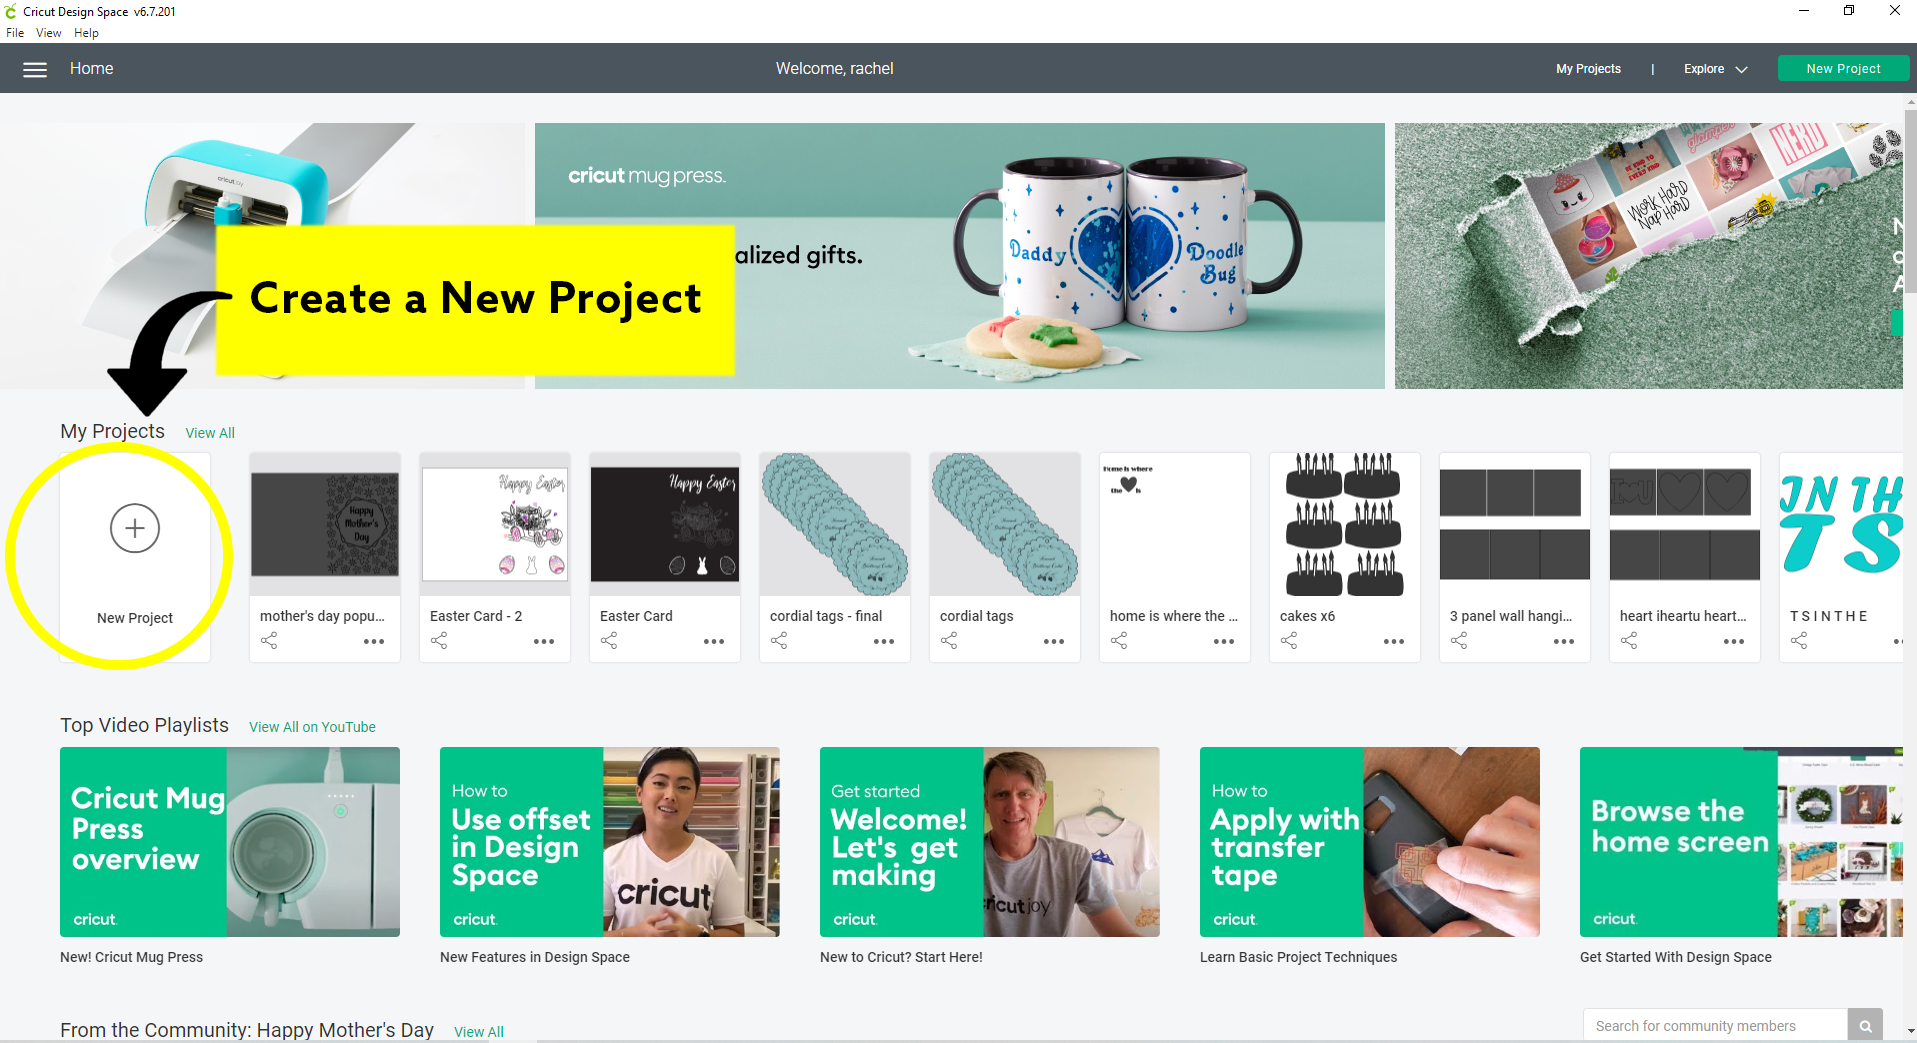
Step 2: Create A New Project
Open Cricut Design Space and click on “New Project”
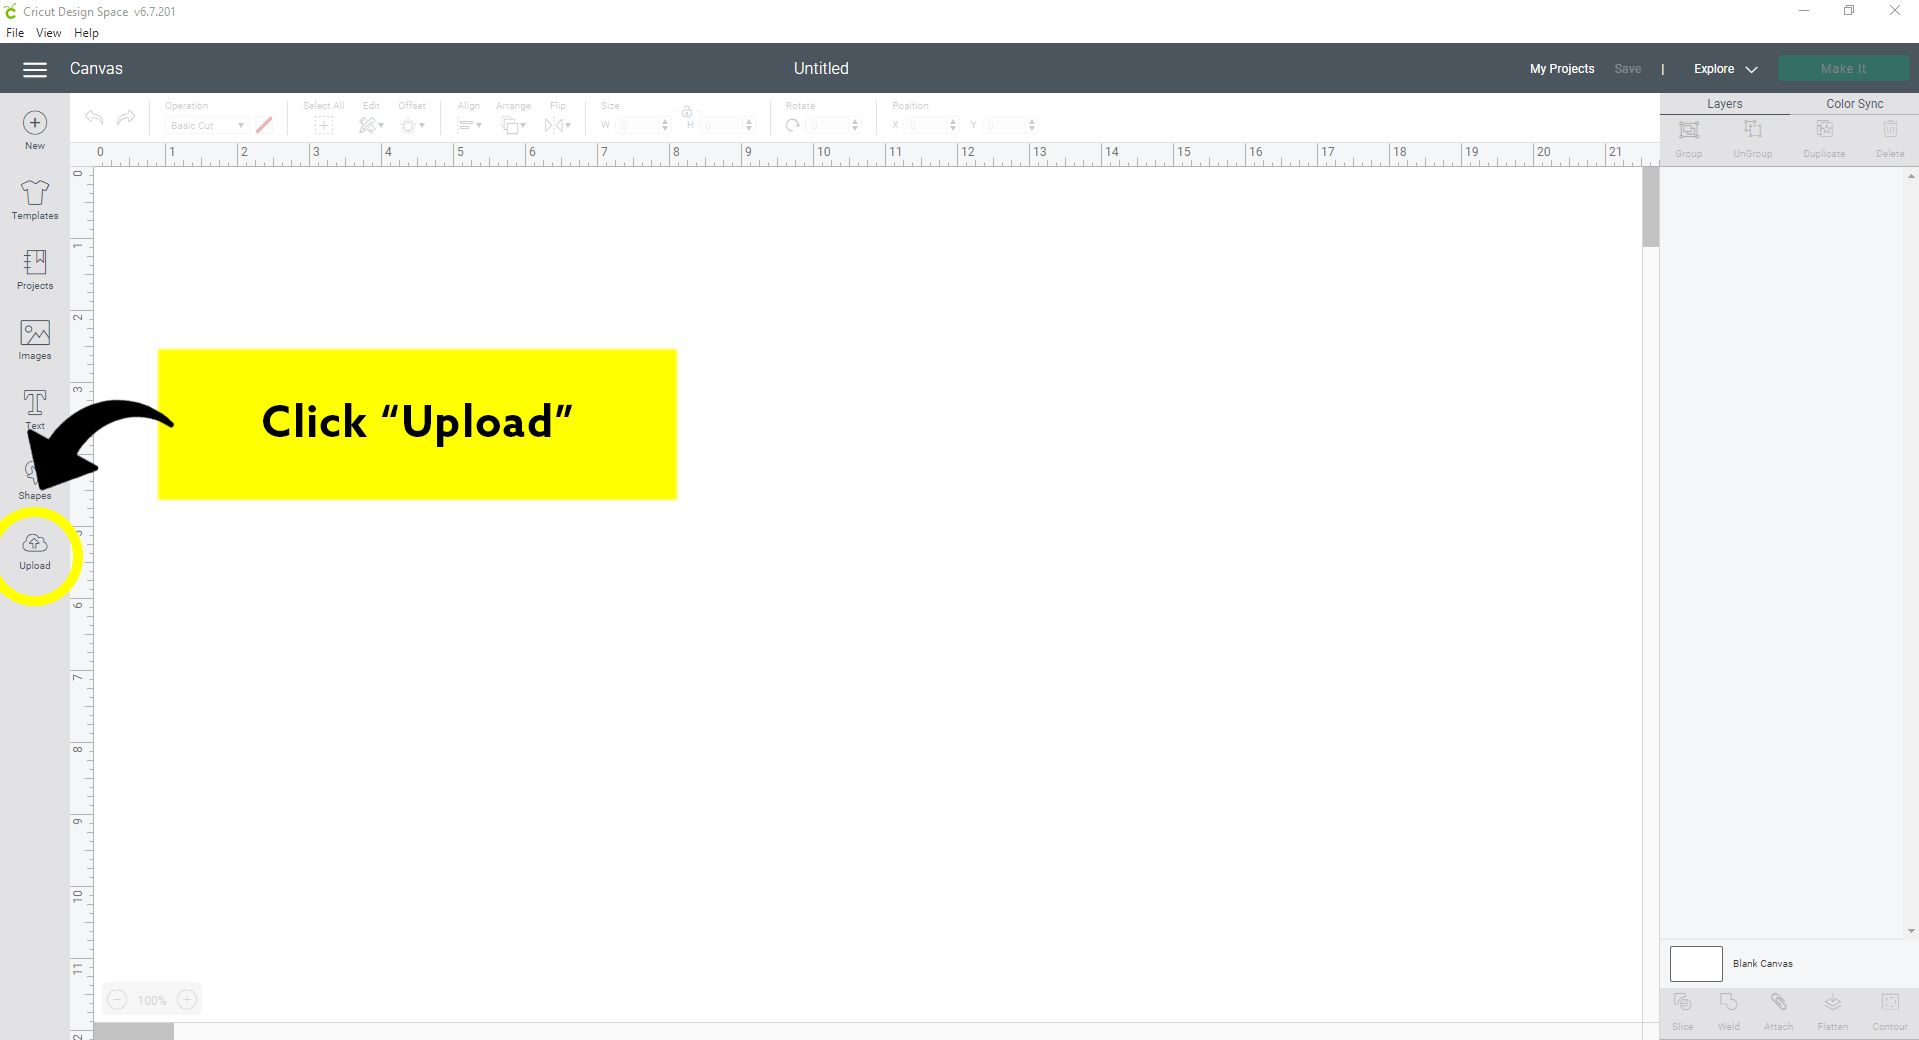
Step 3: Upload the Design
(part 1)
Click on “upload” - “upload image” - and finally “browse,” and upload the design SVG you just downloaded from Etsy. If you didn’t save it to a specified location on your computer then it is likely in your “Downloads” folder.
(I have my Design Space grid lines turned off which may be why my screen doesn’t look exactly like yours, that’s ok! If you want to shut grid lines off too you can click on the 3 line menu button in the top left-hand corner of the screen under “File” and above the “New” button, and click “Settings” then under “Canvas Grid” check the box next to “No Grid”)
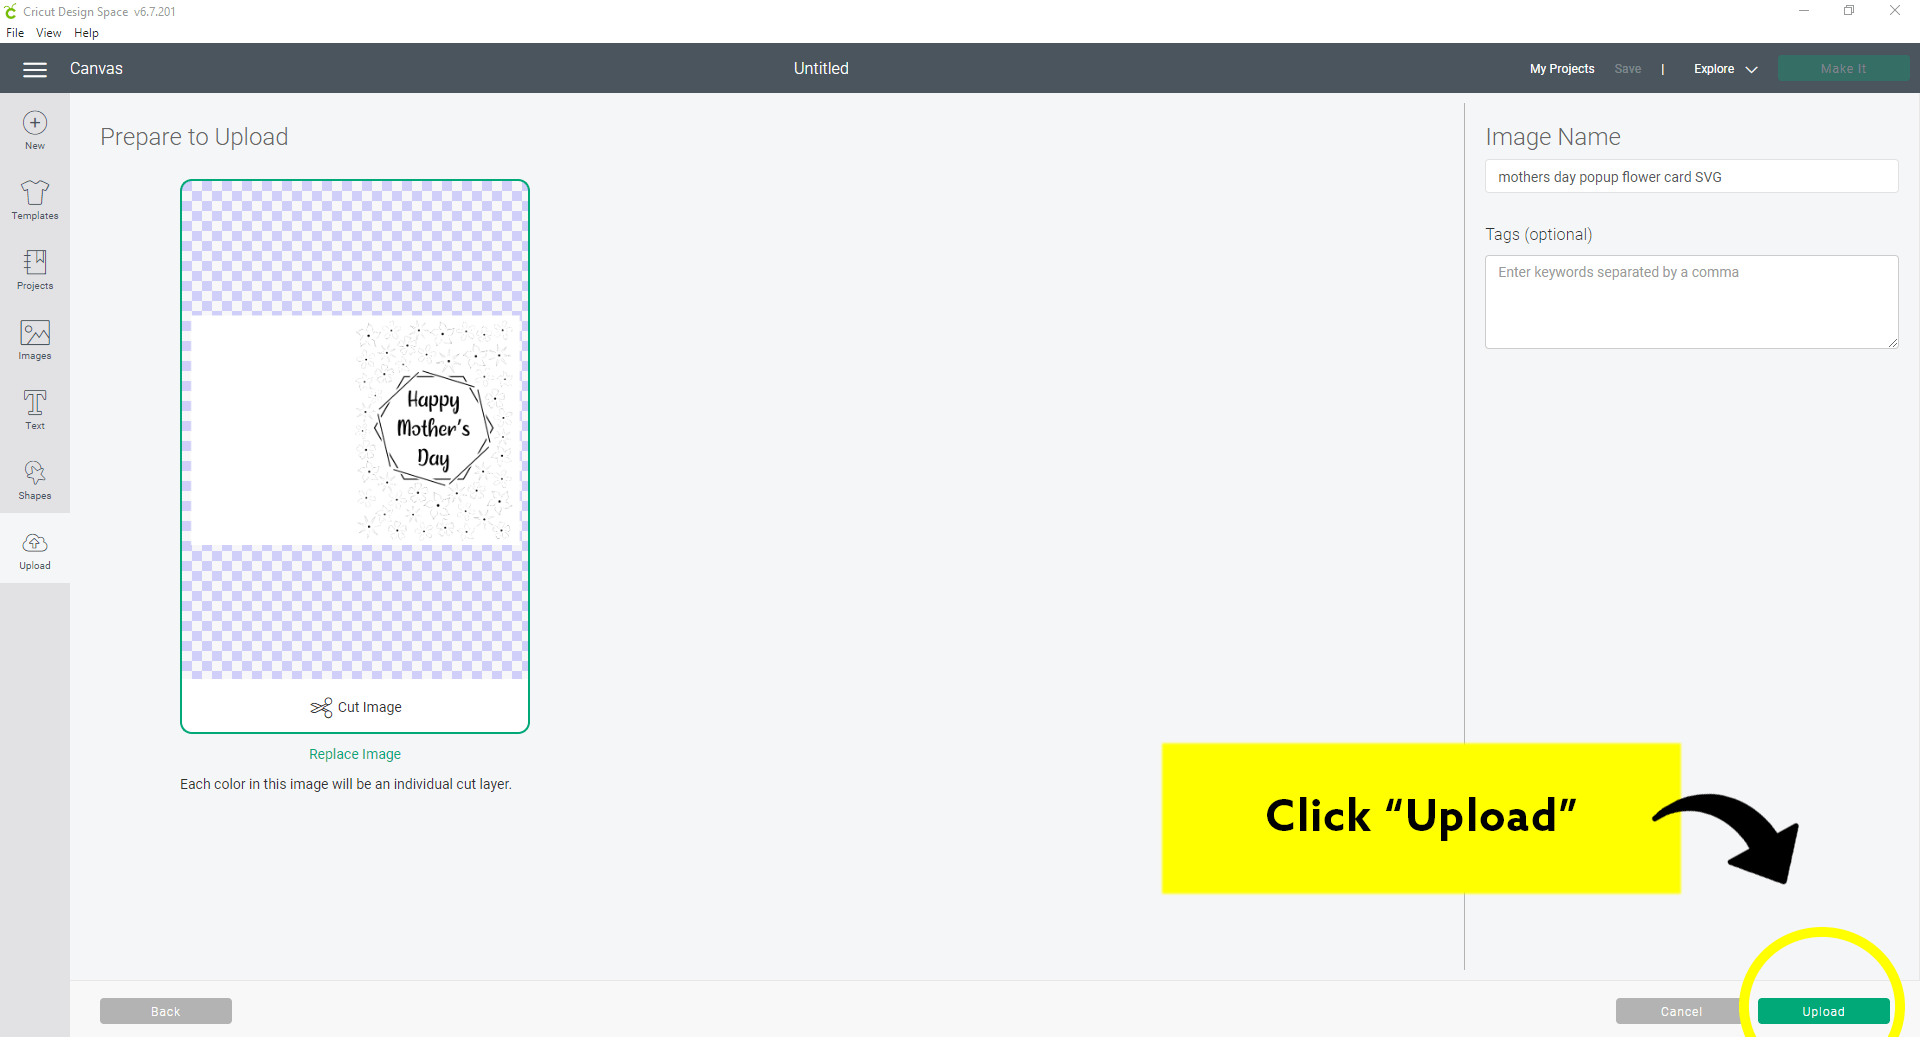
Step 4: Upload the Design
(part 2)
Once you have found your SVG file and uploaded it to Design Space, it will give you a quick preview of the file. Next, you'll click “Upload” in the bottom right-hand corner of the screen.
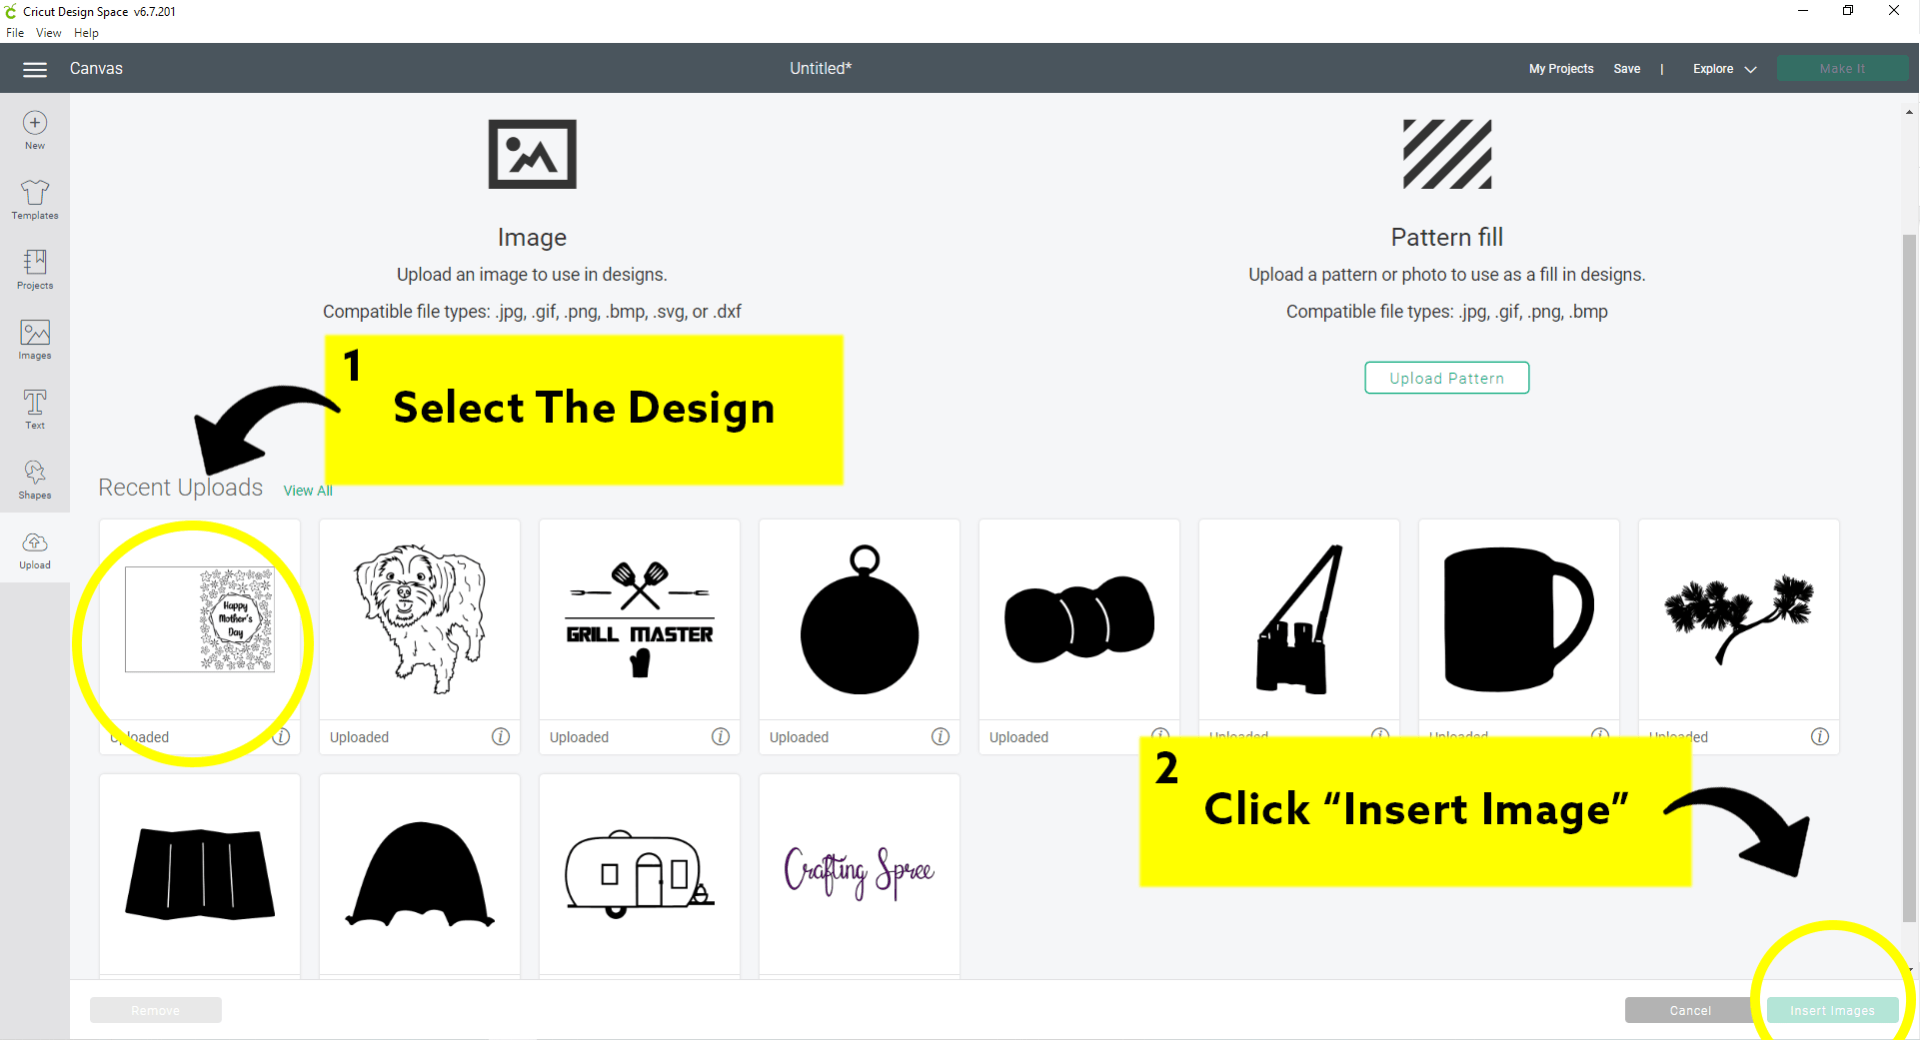
Step 5: Insert The New Design
Select the uploaded design under “Recent Uploads” then click “Insert Image” in the bottom right-hand corner of the screen.
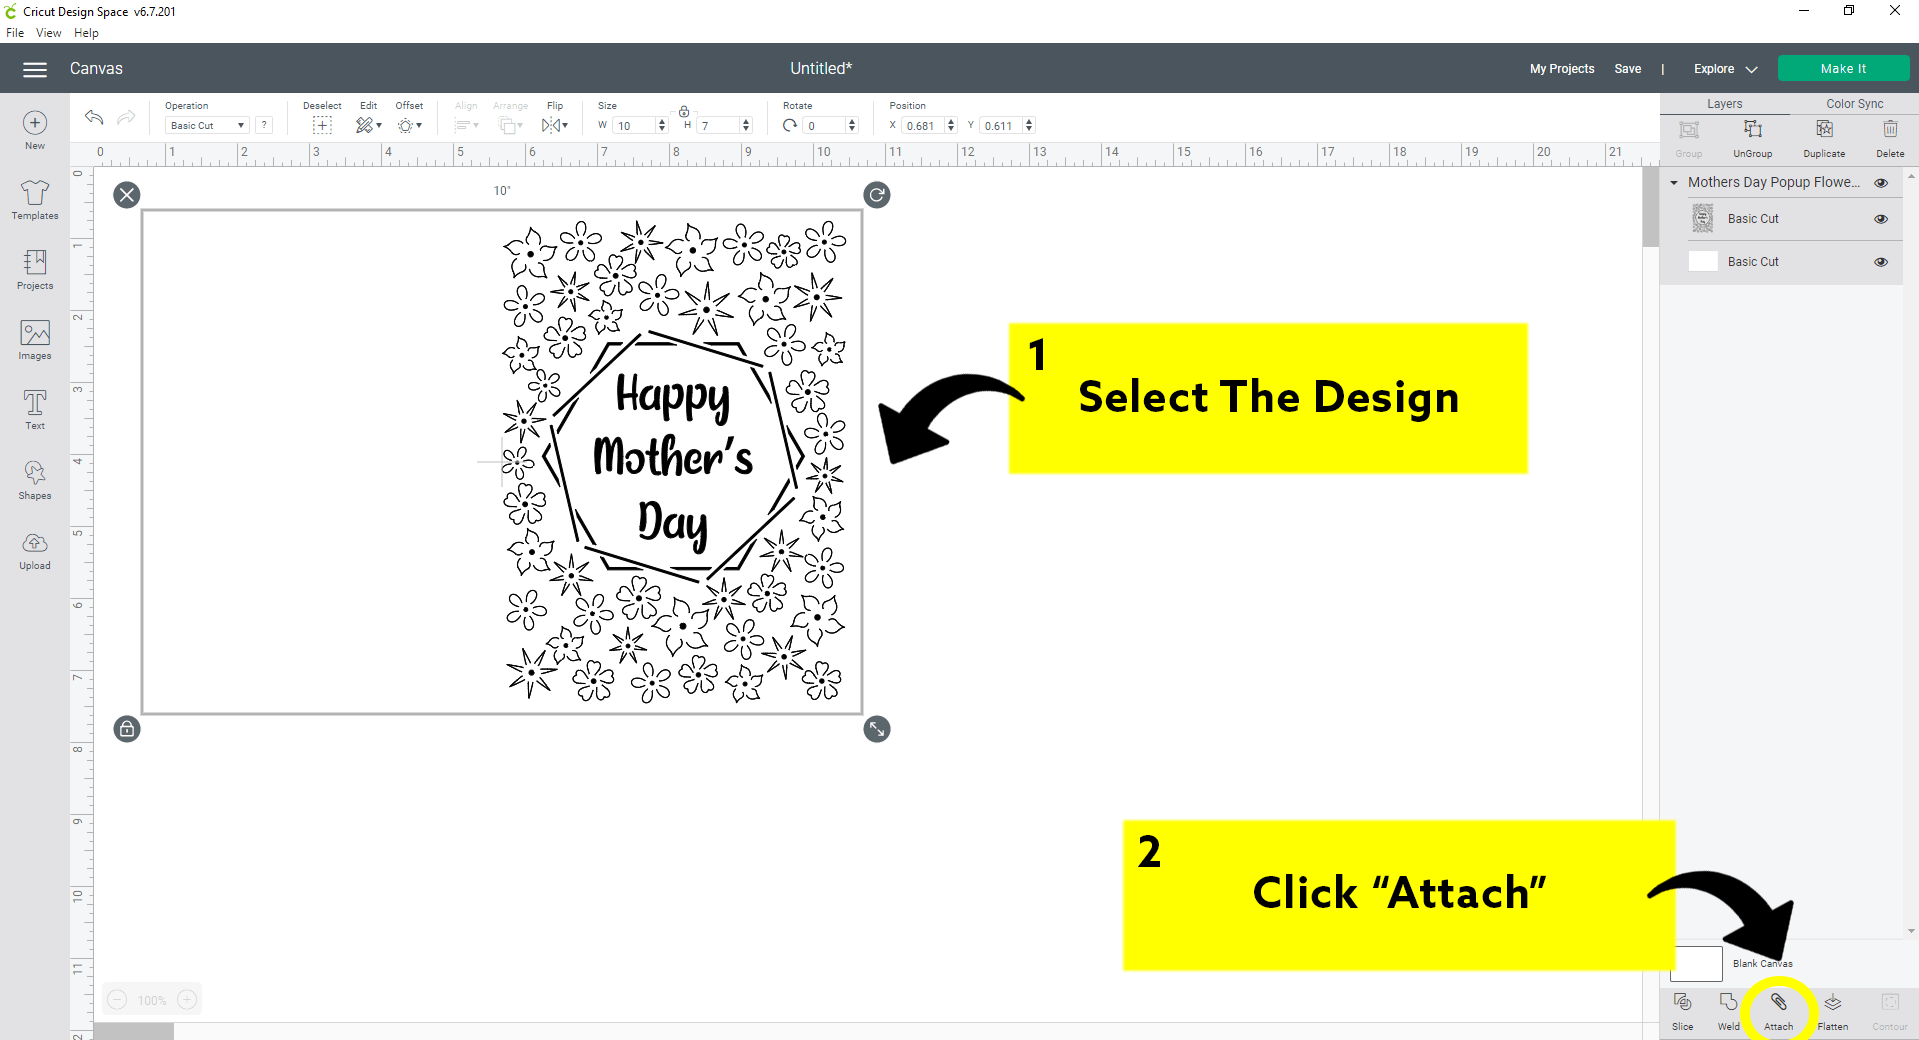
Step 6: Attach Your Components
Once the design is uploaded you will need to attach everything together. To do this, click on the design to select it, and then click the “Attach” button in the bottom right-hand corner of the screen that has the paper clip icon above it.
What does attach do?
Attach keeps all your components together. If you did not attach this design, and went straight to clicking “Make It” then Cricut Design Space would separate every cut and component of the design and arrange them in the most space-efficient way on the grip mat. This means it would cut out the rectangle as a separate shape, and would cut out rows and rows of individual petals instead of flowers, and the letters that spell out “Happy Mother’s Day” would be scattered across the mat. We DEFINITELY don’t want it cutting out each component separately in a random arrangement on the mat, so we select everything and hit “attach” so it all stays together.
To get a better understanding of what “Attach” does, along with what on earth “weld” and “group” do, check out this quick video breakdown on
the difference between “group,” “weld,” and “attach.”
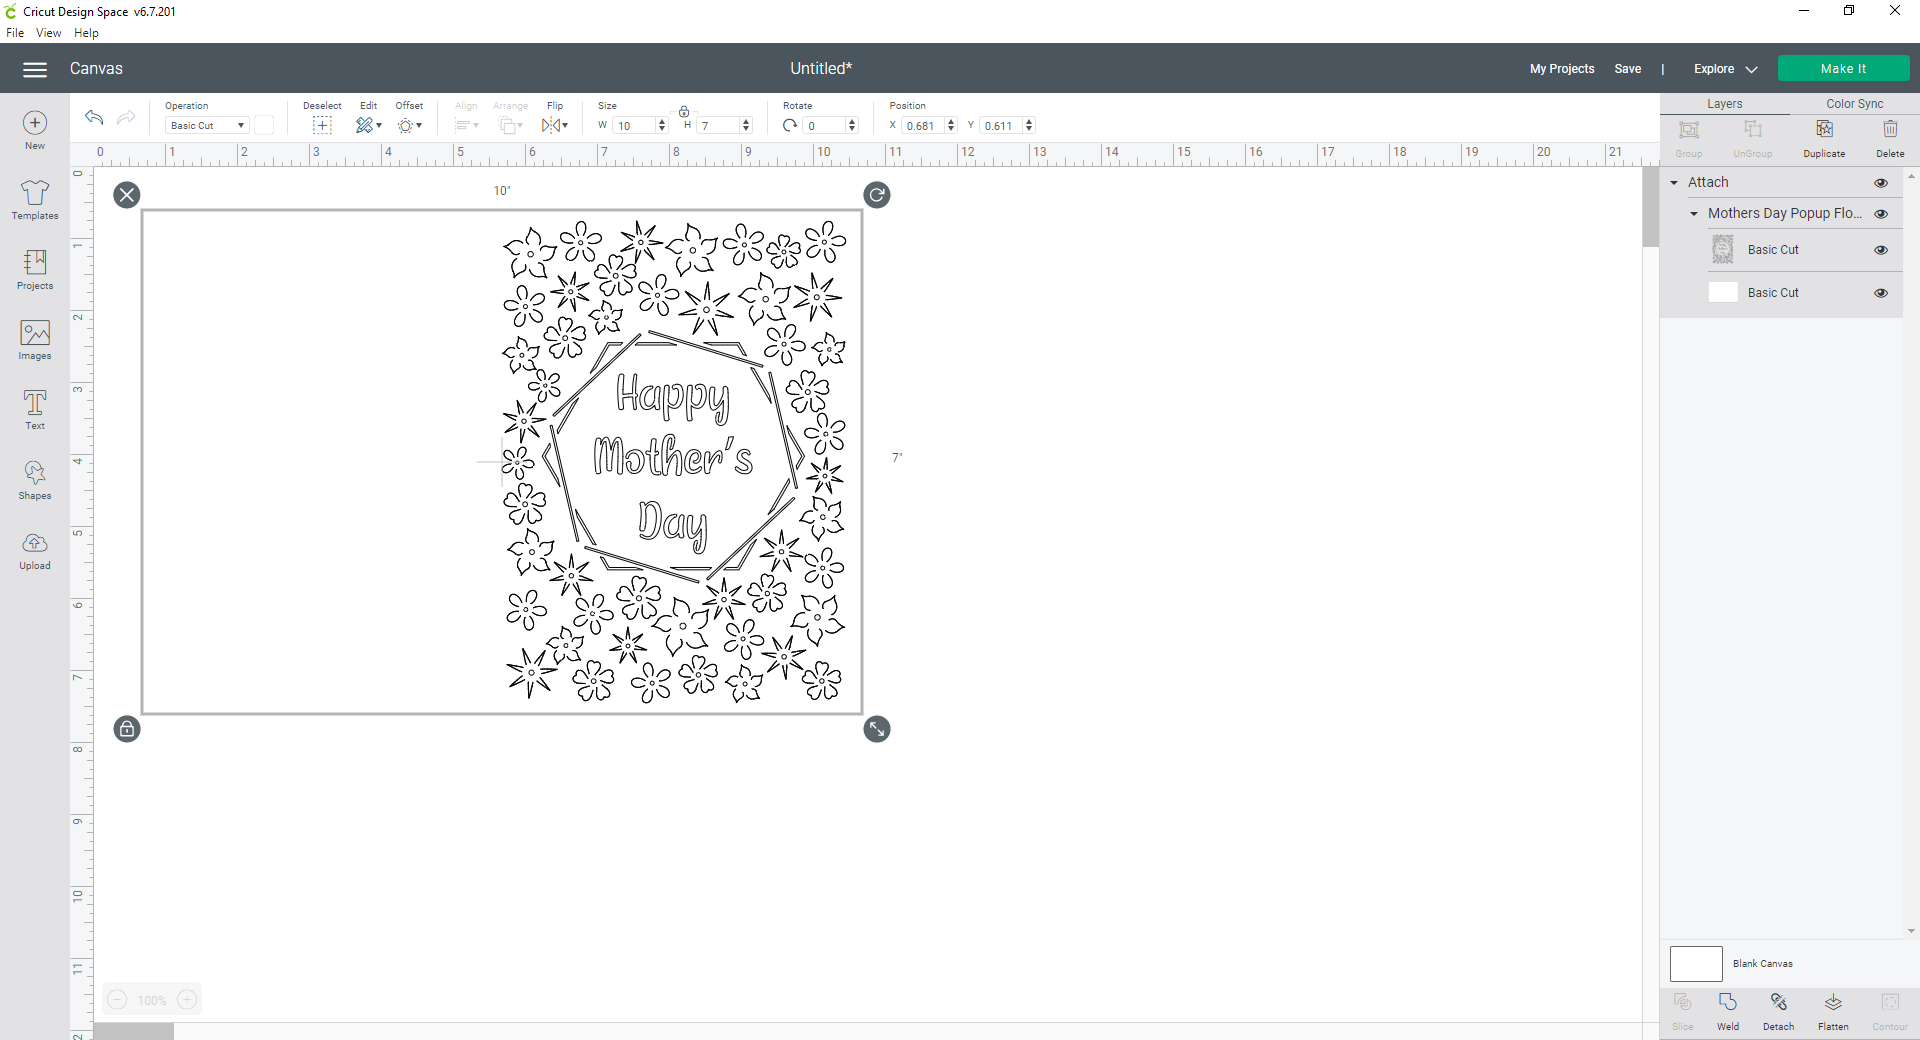
It should look like this once everything is attached:
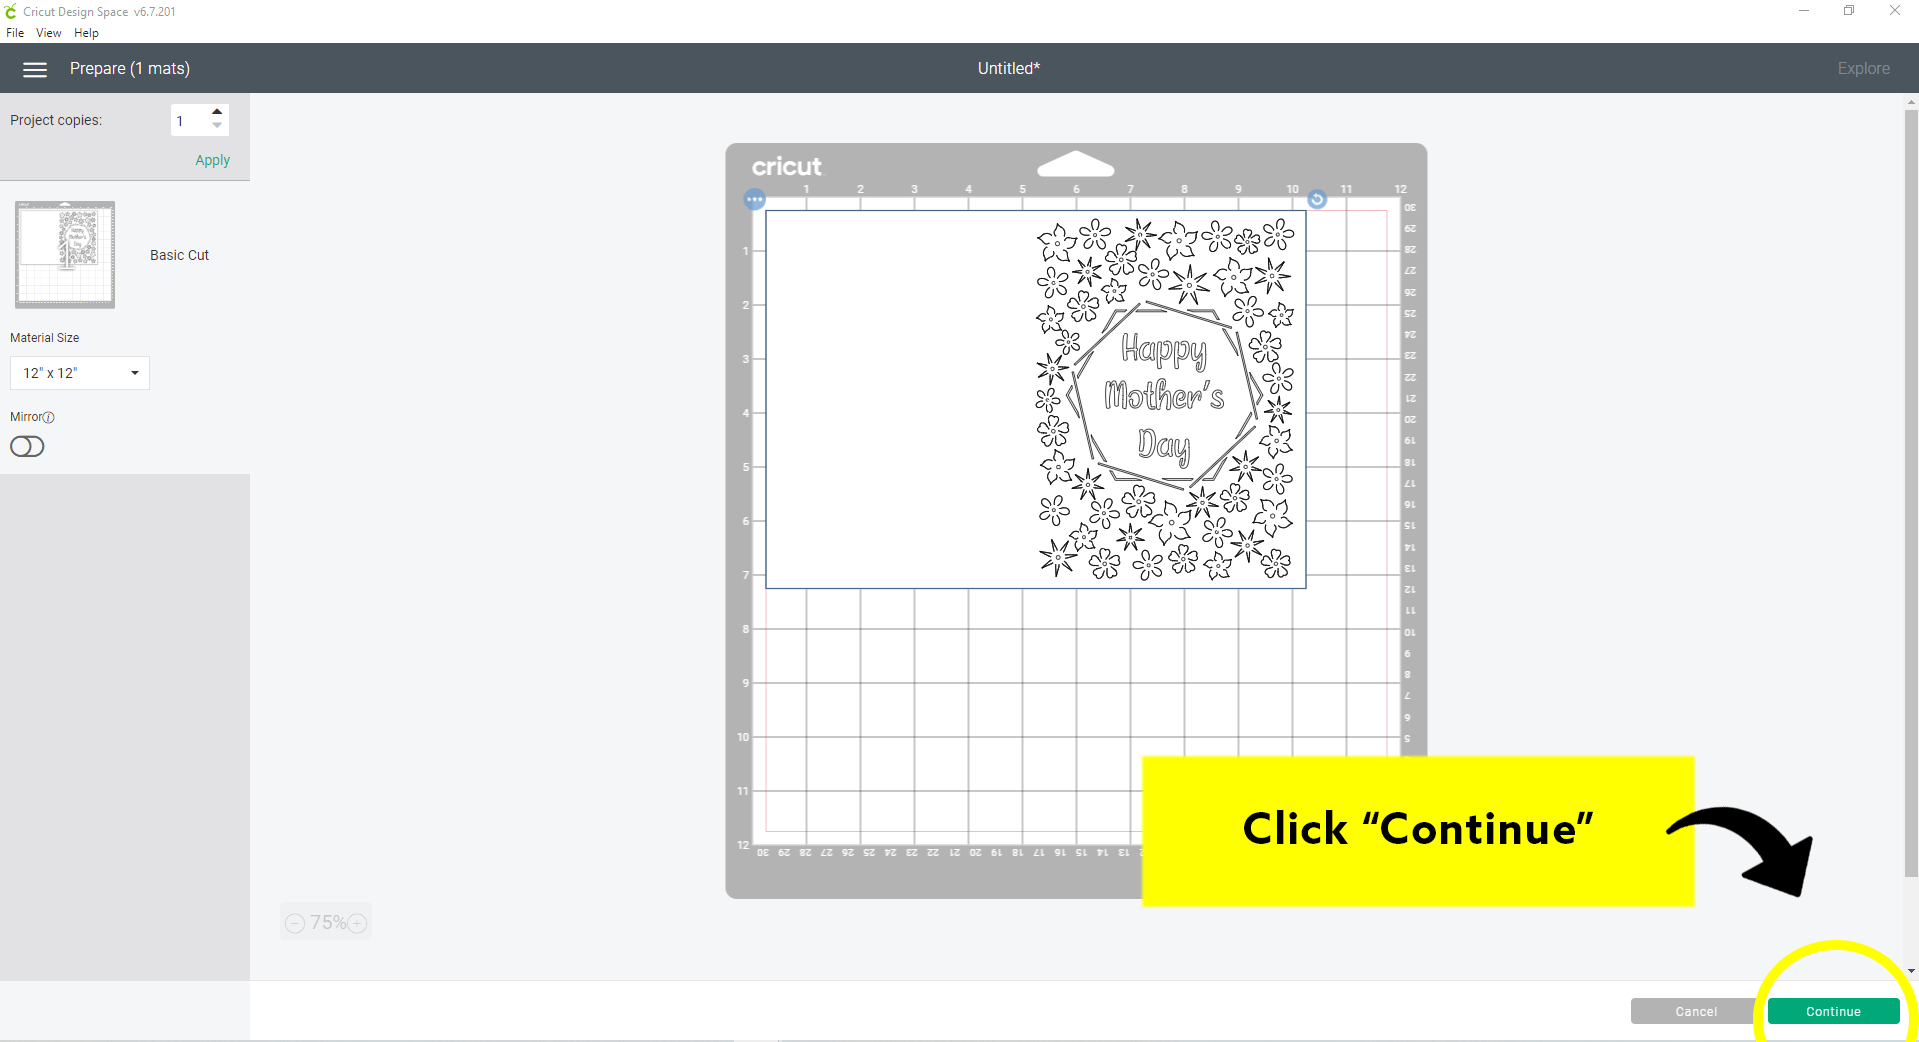
Step 7: MAKE IT!
Next, click “make it” in the top right-hand corner, and verify that it looks correct in the cut preview. If the card is taken apart and all the components are separated, your components are not attached and you will want to take another shot at step 6.
If everything looks good, click on “continue” in the bottom right-hand corner of the screen.
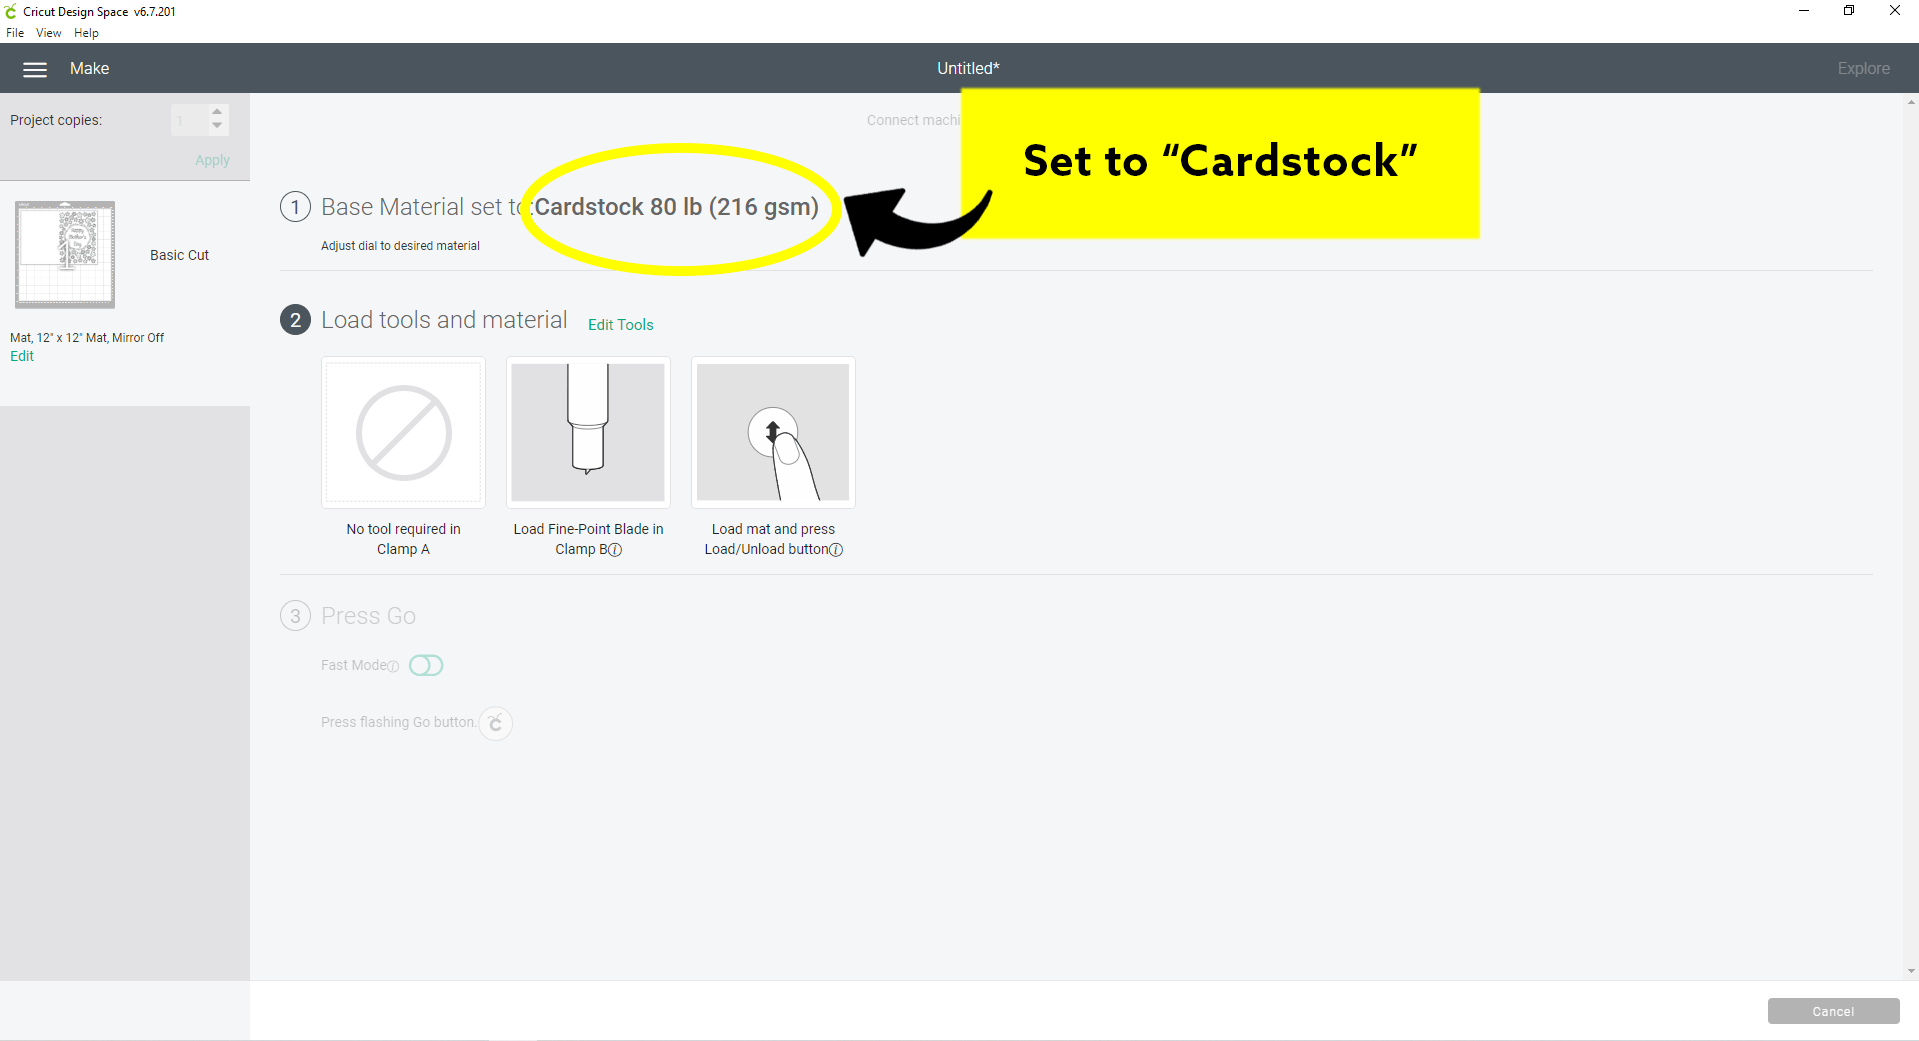
Step 8: Check Settings
Once your machine is on and Cricut Design Space can detect it, double check your settings and make sure that the material is set to “Cardstock” and double check that you have either the fine point or deep cut blade in its proper housing.
Again, I prefer the deep cut blade for cardstock but that’s a personal preference. Ultimately it’s completely up to you what you want to try and what works best for you!
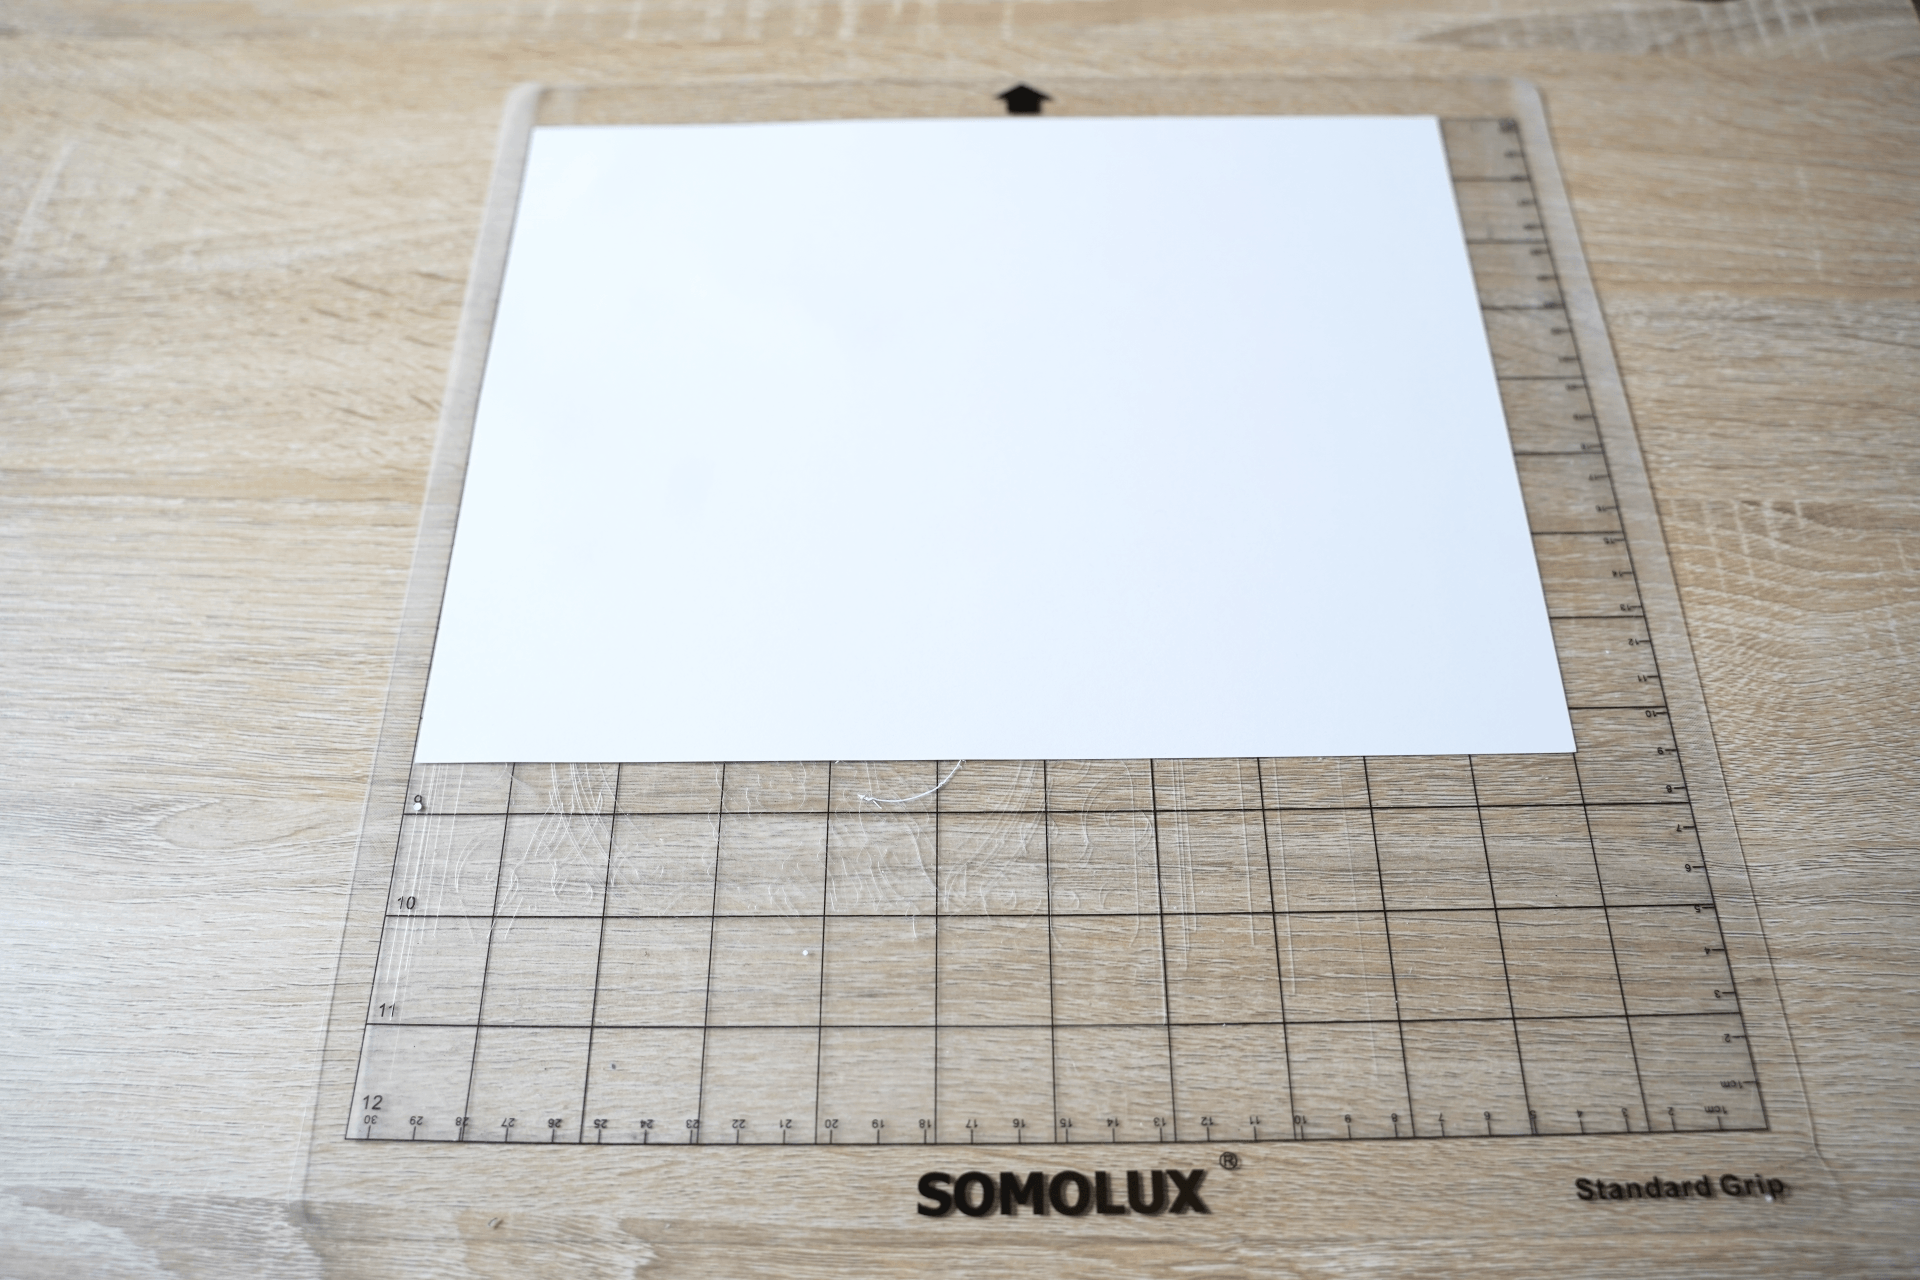
Step 9: Load The Paper
Now we’re ready to load our cardstock onto our grip mat. You’ll want to orient the paper landscape on the mat so nothing gets cut off. Make sure you’re using the standard grip mat, and cardstock paper.
You can see above that I’m not using a Cricut-brand grip mat. I love testing less expensive off-brand products to see what’s out there that’s just as high of quality, if not better, for a lower cost and these are one of my favorite finds. I like these grip mats more than the Cricut brand ones because they’re not as sticky so when I remove projects off the mat it’s easier to remove, things don't rip, and my project doesn't get that curl to it afterwards, the way it did on the stickier Cricut mats AND they’re roughly half the price. If you’re interested in giving them a try, these are the ones I use:
I also use off brand blades, you can see the ones I used for this project did just as good of a job as the Cricut brand blades but again they were a
significantly lower price. I was able to
get 30 deep cut replacement blades for LESS than the cost of 2
Cricut brand deep cut replacement blades so once I tried them out and noticed zero difference in quality when I tested each brand back-to-back, I started only buying this brand of off brand blades. If you’re interested in trying them out, this is the brand I use:
According to the Amazon listing, the blue cap blades are the 60 degree
deep cut blades, the red capped blades are the 45 degree
standard blade , and the yellow capped blades are the
30 degree blade which it's my understanding is for thinner materials like vinyl.
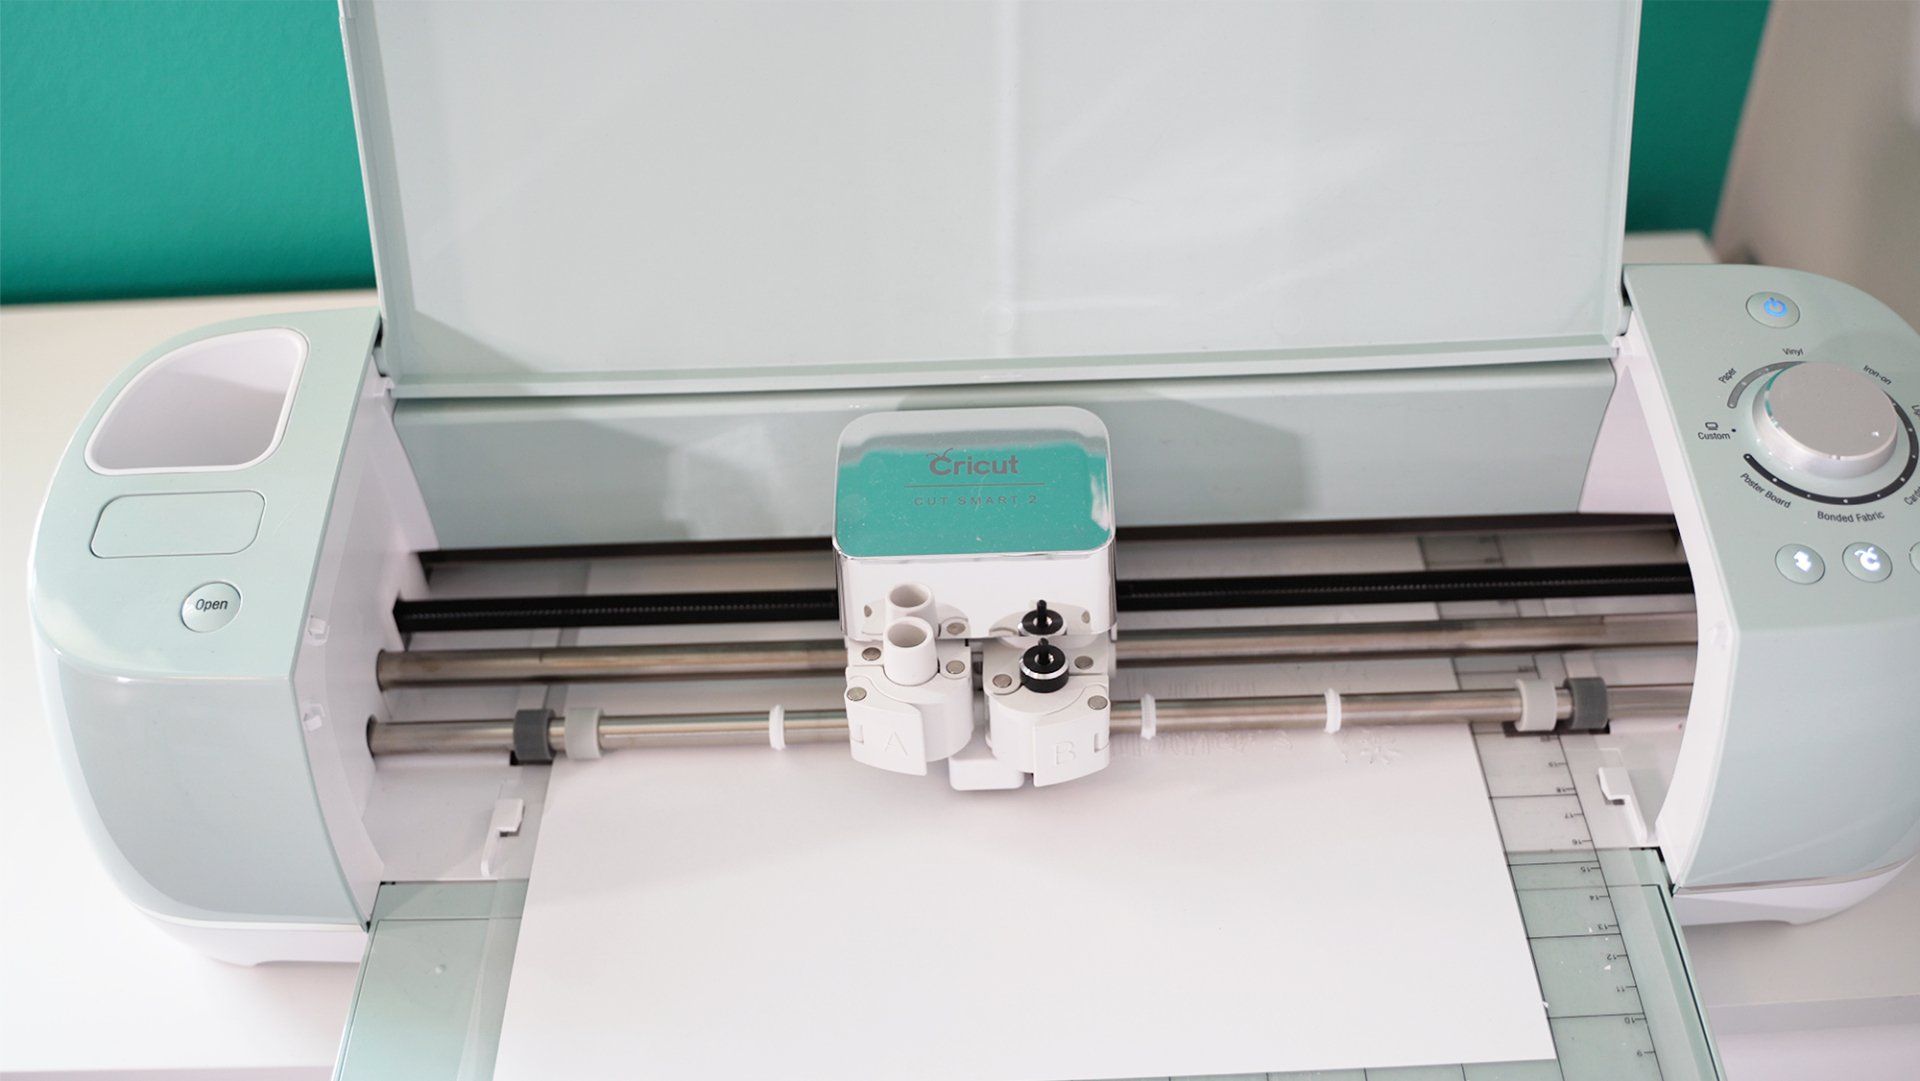
Step 10: CUT!
Once your paper is on you’re ready to load your mat into the machine! Insert the mat as far as it will go, then hit the load button (the button with the arrows that should be flashing right now)
Now that the mat is loaded, it’s time to sit back and let our Cricut do the hard part for us! Hit the “cut” button on your machine (the Cricut logo button that should be flashing now) and watch it work its magic!
Step 11: Remove & Fold
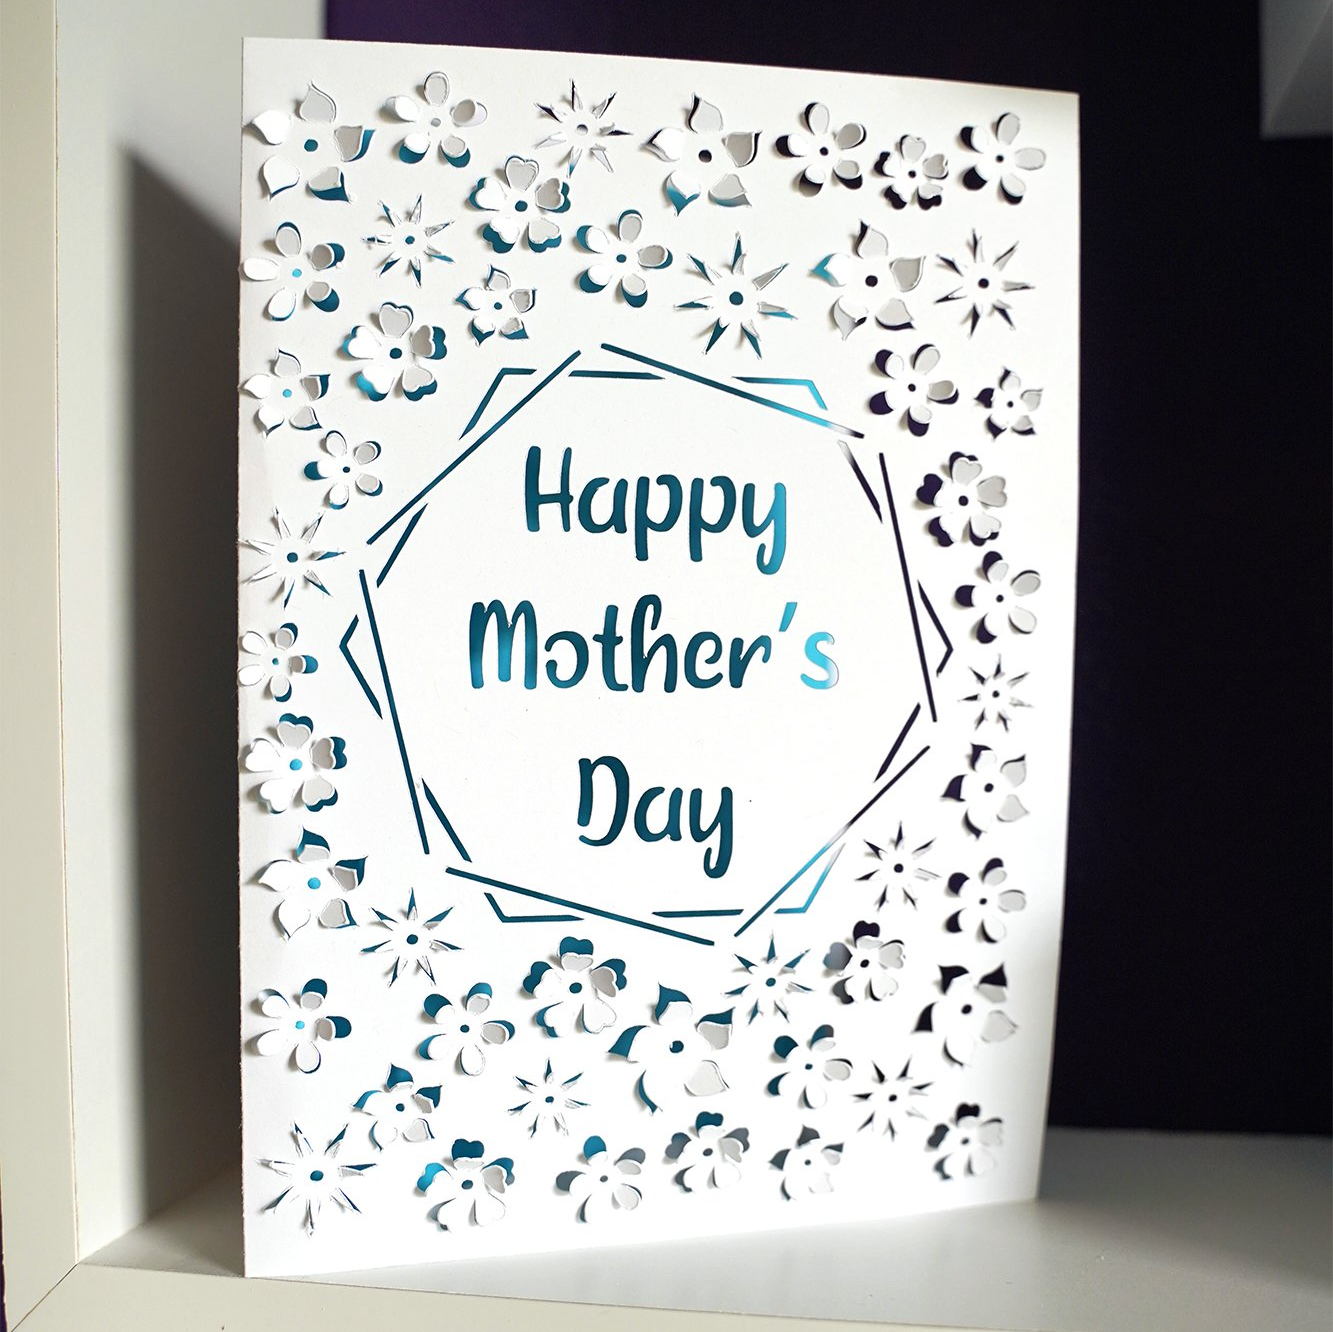
You’ll want to be very gentle removing the card from the mat because we don’t want to rip any petals off and leave them behind on the mat so just carefully remove the card and then fold it in half.
Folding first, was a lesson I learned the hard way my first time making this because me being me I wanted to do the fun part first which was popping out the petals but I wound up spending all this time meticulously poking the petals out just to have around half of them get flattened back in place after I folded the card in half. So learn from my mistake and wait just a little bit longer on the fun part and fold the card first!
WARNING:
Do not start poking petals out until you have folded your card!
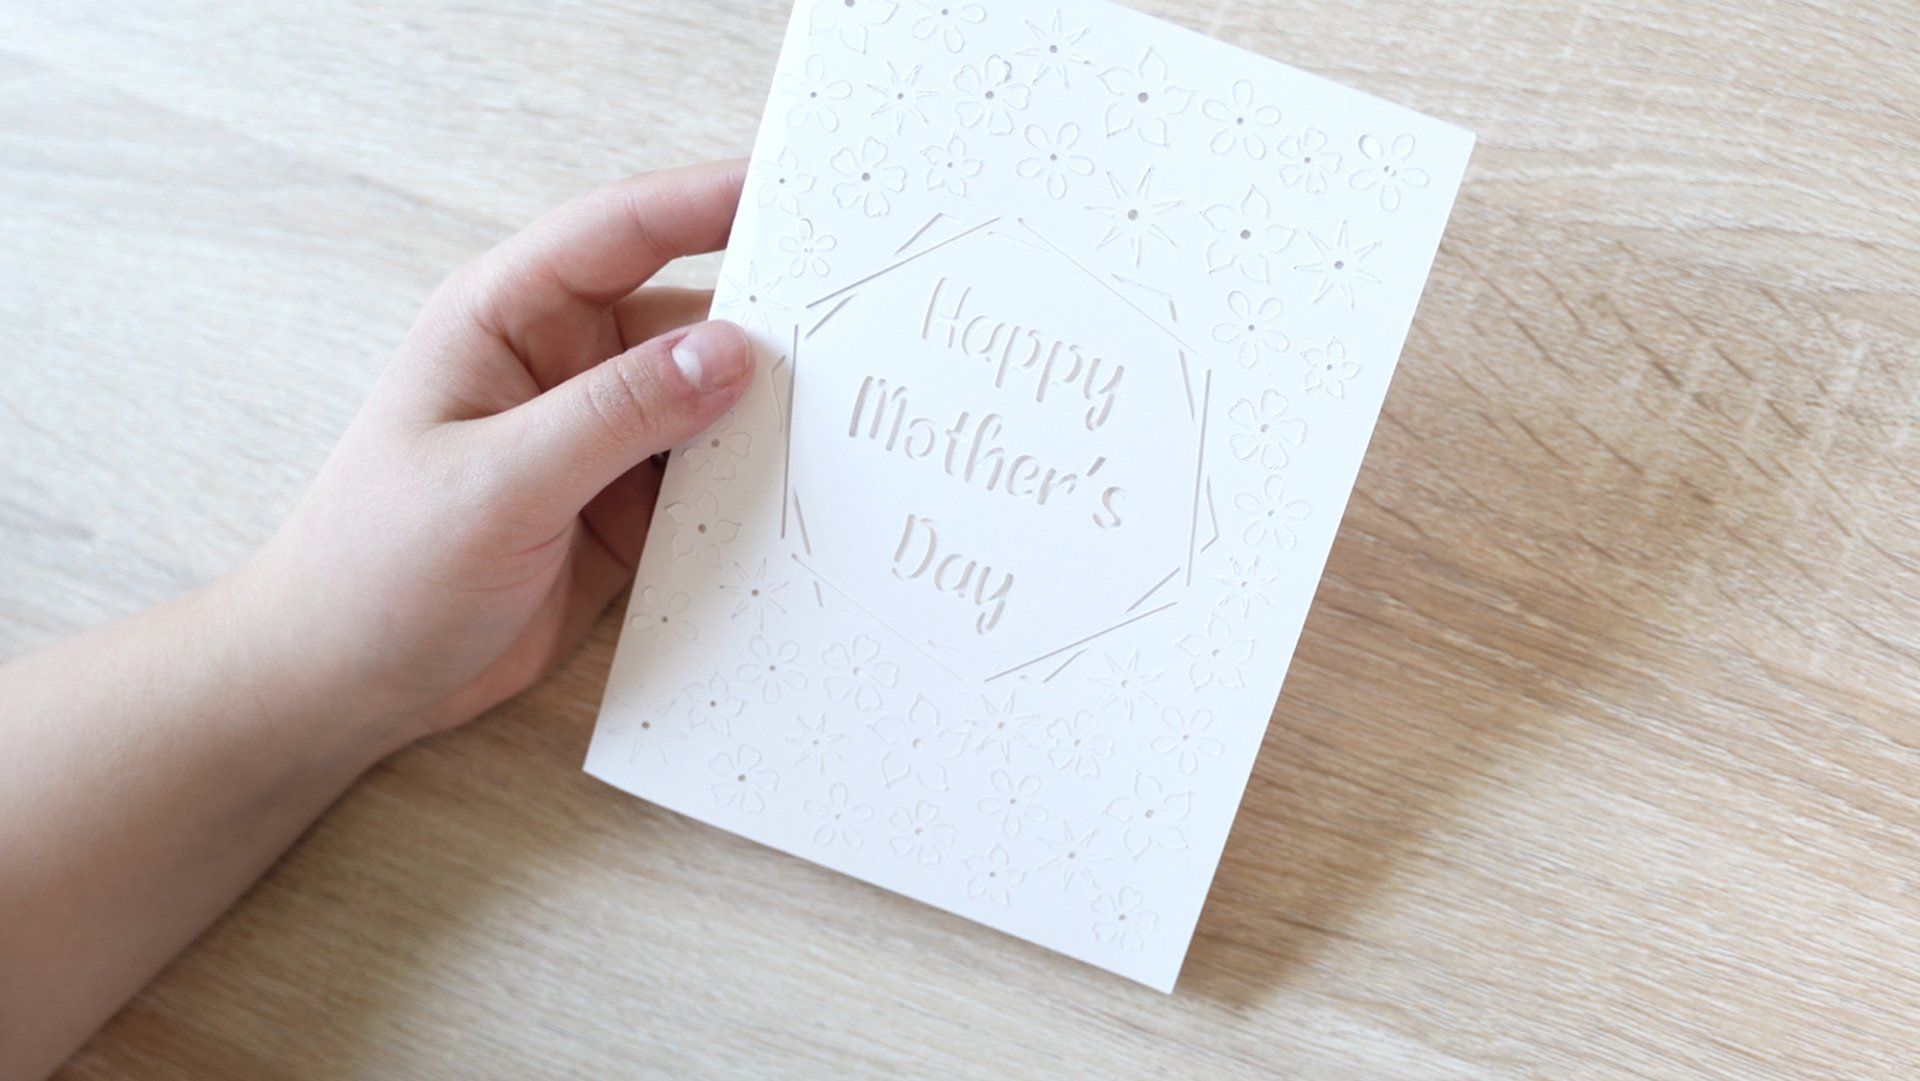
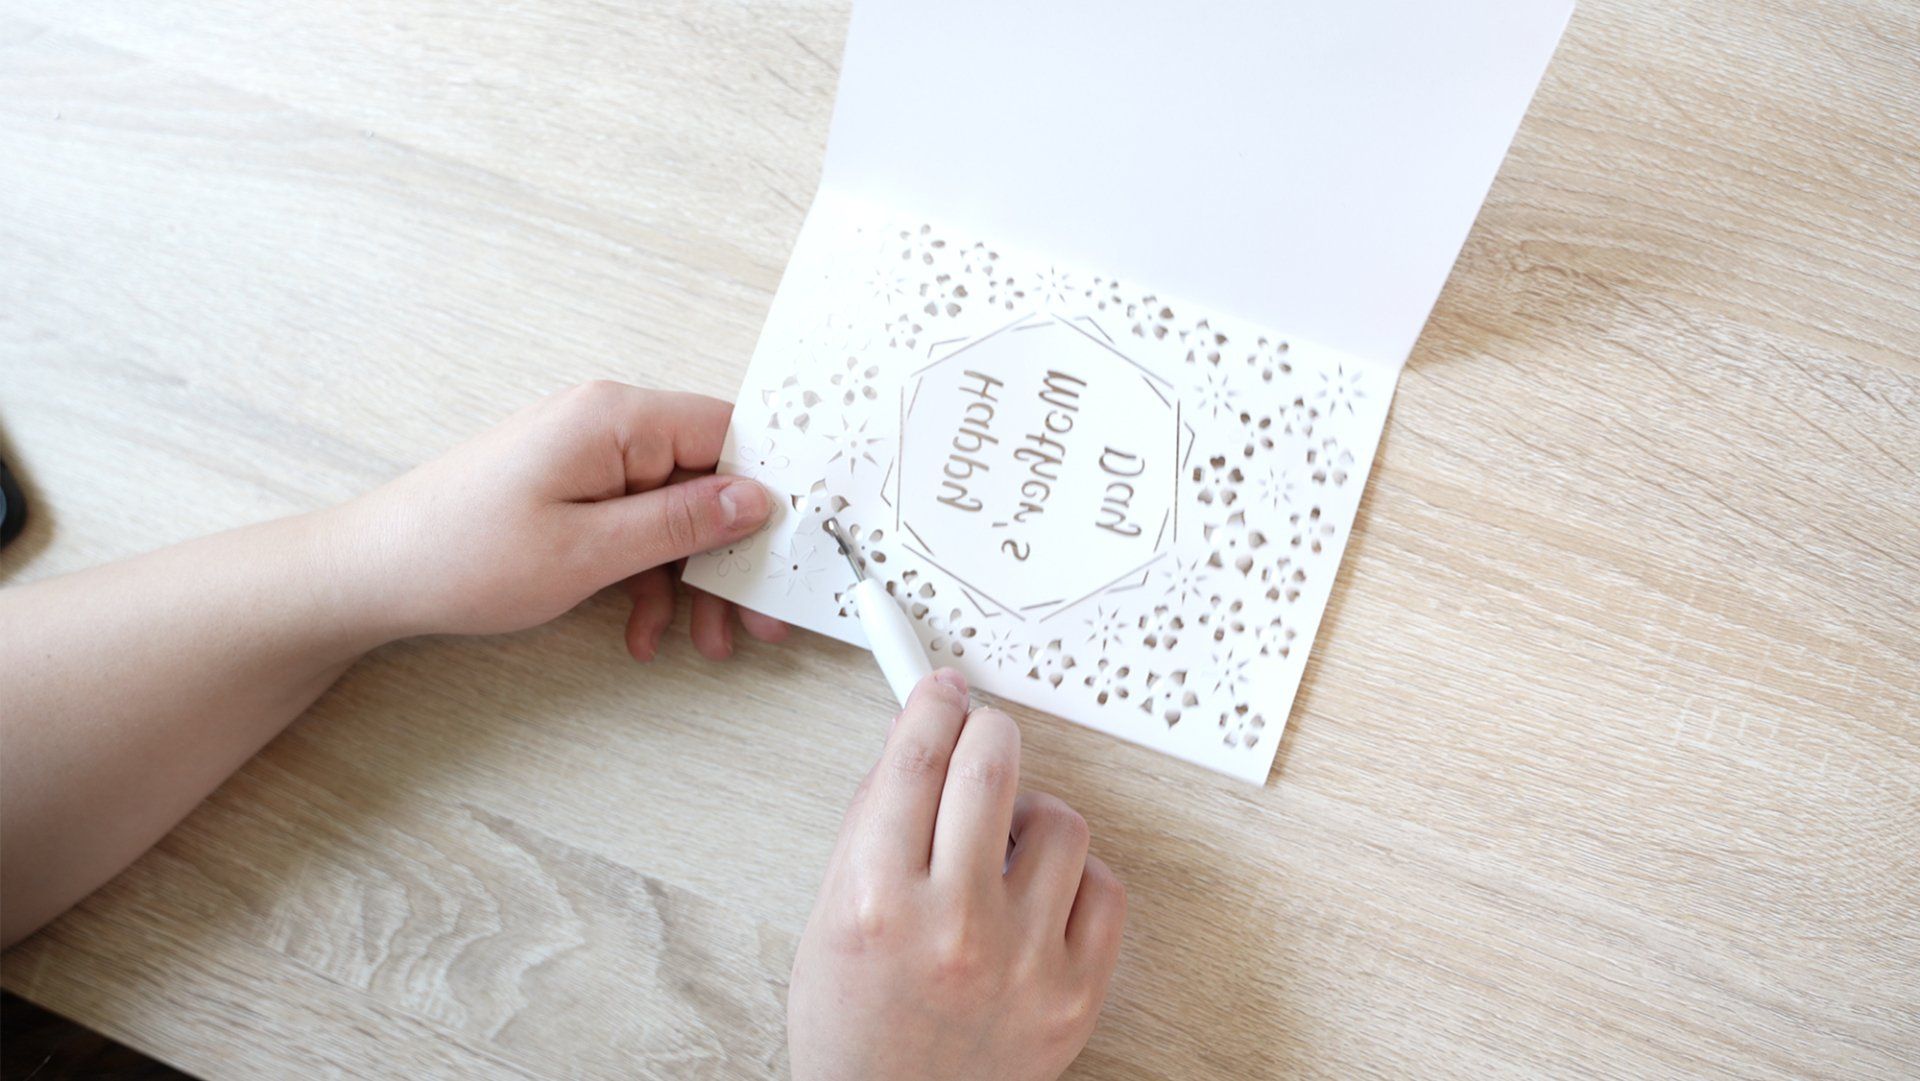
Step 12: Petal Popping!
WARNING:
Do not start poking petals out until you have folded your card!
If you couldn’t tell, this is definitely my favorite part, because it’s where we see our card really come to life and transform. Get your weeding tool (or makeshift weeding tool: the handy-dandy toothpick or straightened out paper clip) and start popping out the petals by poking them out from the back of the card.
It helps to poke them through at a pretty dramatic angle so they're poking out as much as possible, so that once we’re done, it’s just a matter of flattening down petals we think are poking out too far, rather than trying to pull petals out more. I found it’s a lot easier and faster to fix an overestimation than to fix an underestimation.
(Optional) Step 13: Add A Pop Of Color!
This step is optional, you’ll see how gorgeous the card is in all white, or in whatever solid color you chose, but if you’re like me and you love a good pop of color, then this extra step is for you!
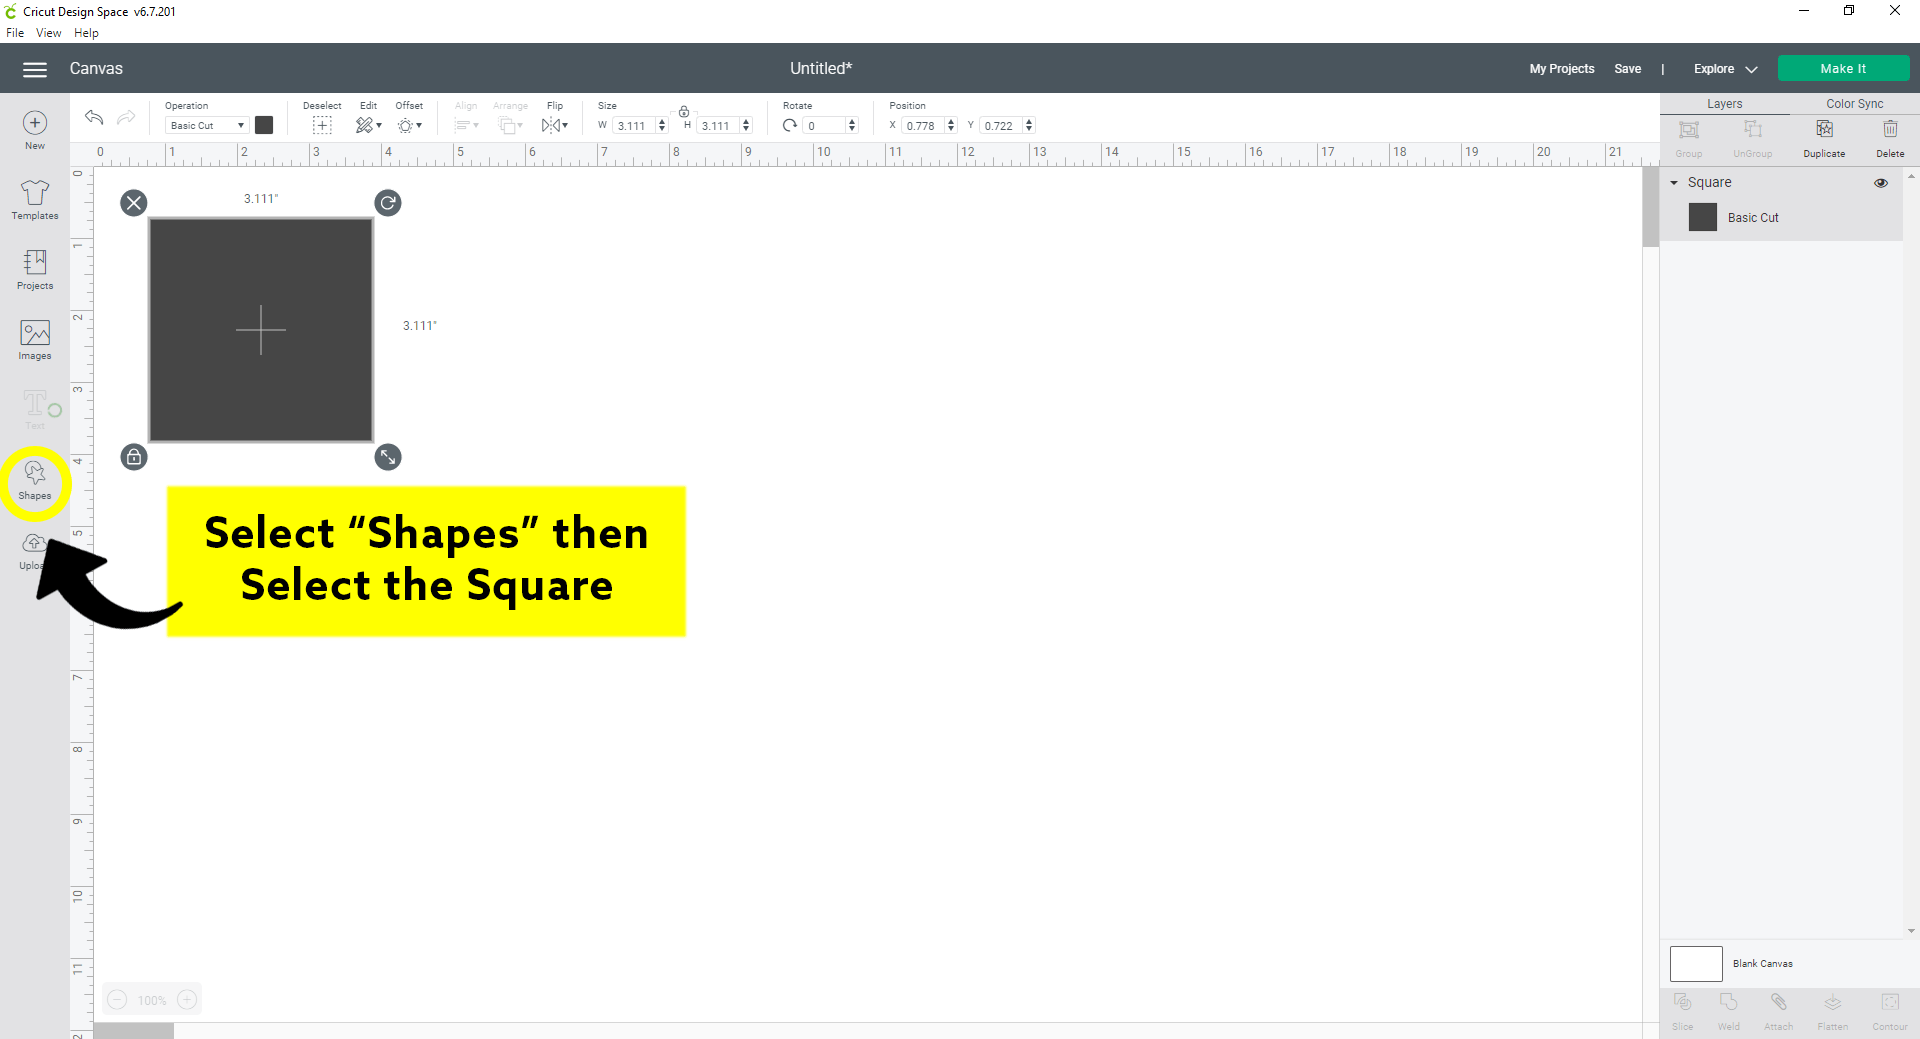
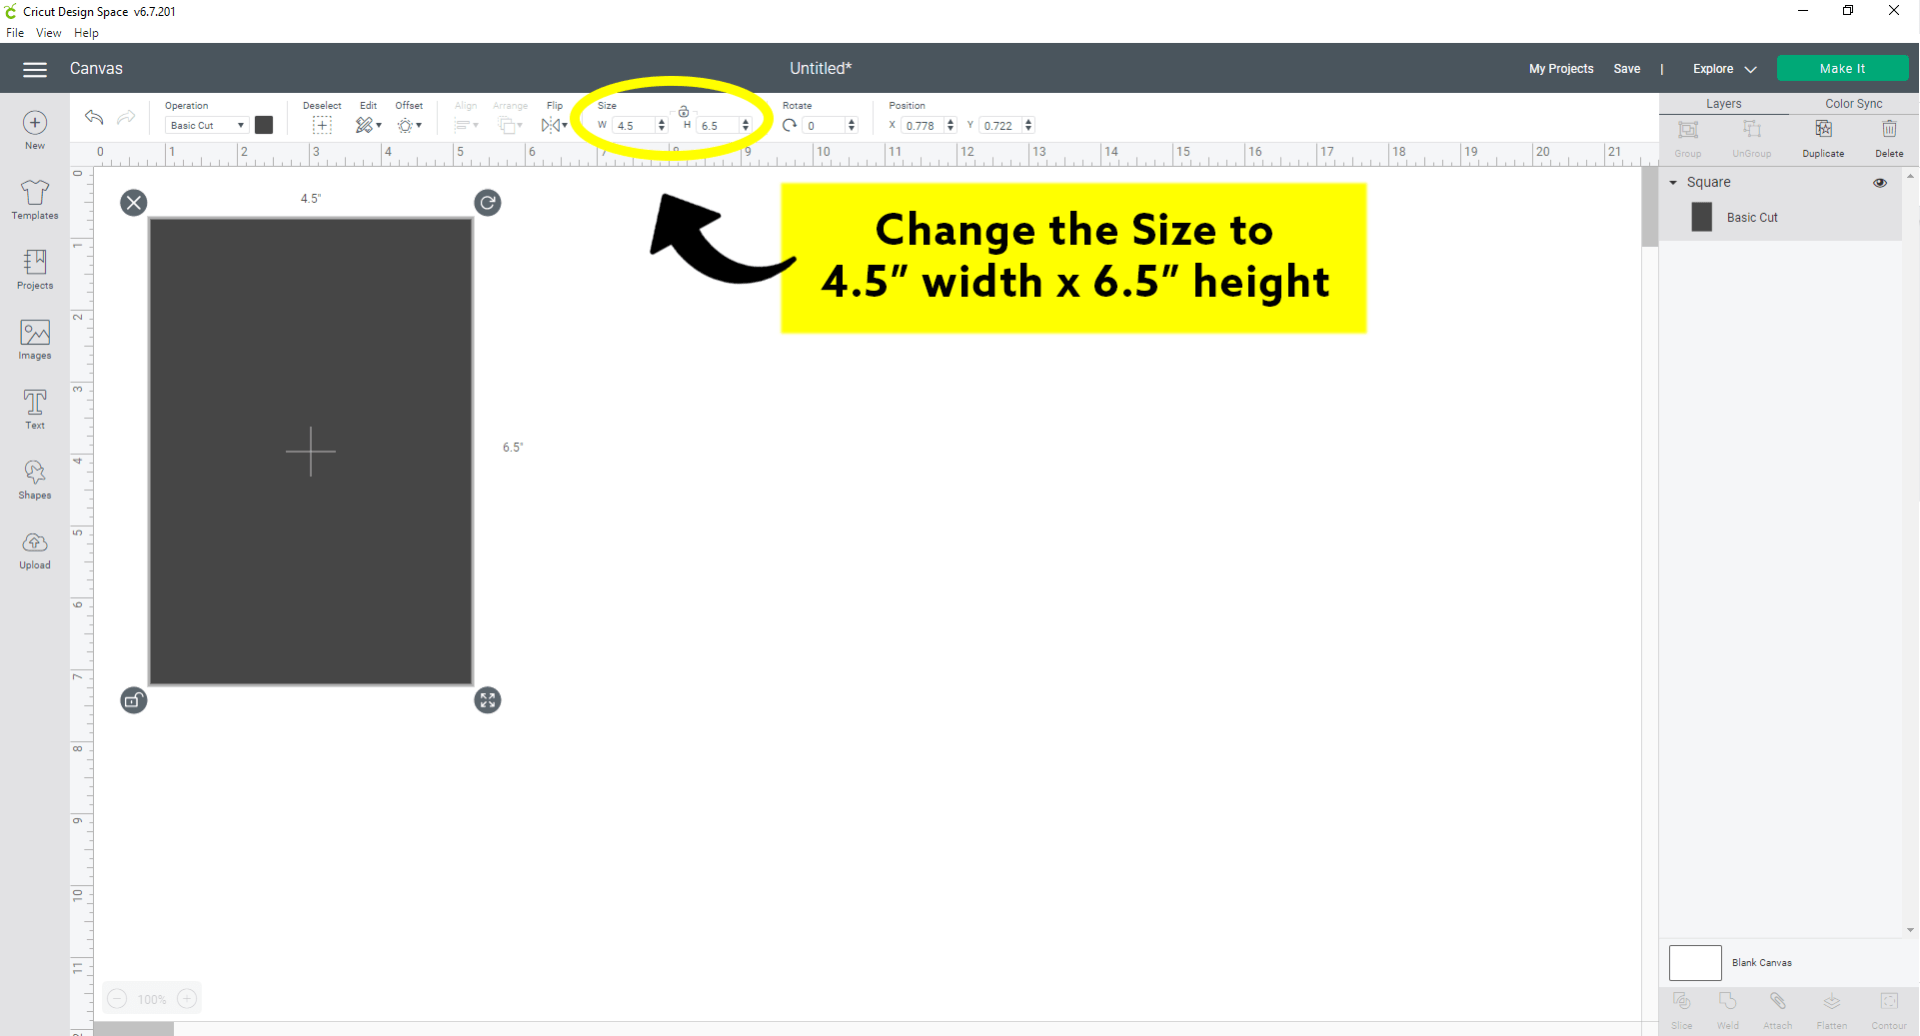
We’ll head back into design space and create the rectangle we need to add that colored insert to the inside of our card. To do that click on “Shapes” and choose the square. Then, click the lock icon in the bottom right-hand corner of the square to unlock the ratios. This will allow you to turn the square into a rectangle.
Next, go up to “size” in the toolbar and enter 4.5” x 6.5” and this will give our insert a ¼” white border once we place it which will give us a little wiggle room for centering, if it’s a little off it won’t be that noticeable, and it’ll also take off the pressure to perfectly align it to the edges of our card.
Now, we can skip straight to hitting "make it" in the top right-hand corner since we only have one shape and one component there is no need to attach anything! Hooray for simplicity!
From here, you’ll just repeat steps 7-11 and come back here once you’re done!
.
.
.
.
.
.
.
SWEET! Now our colored insert is all cut out and we’re ready to paste it into our card! Once you remove it from the mat, apply some sort of adhesive to the back of your colored insert and place it down inside the card! I suggest using 5 small pieces of double sided tape and placing one piece in each corner and one in the middle, but you could also use a glue stick, or normal tape that you loop to make double-sided. Once your insert is placed, you’re finished!
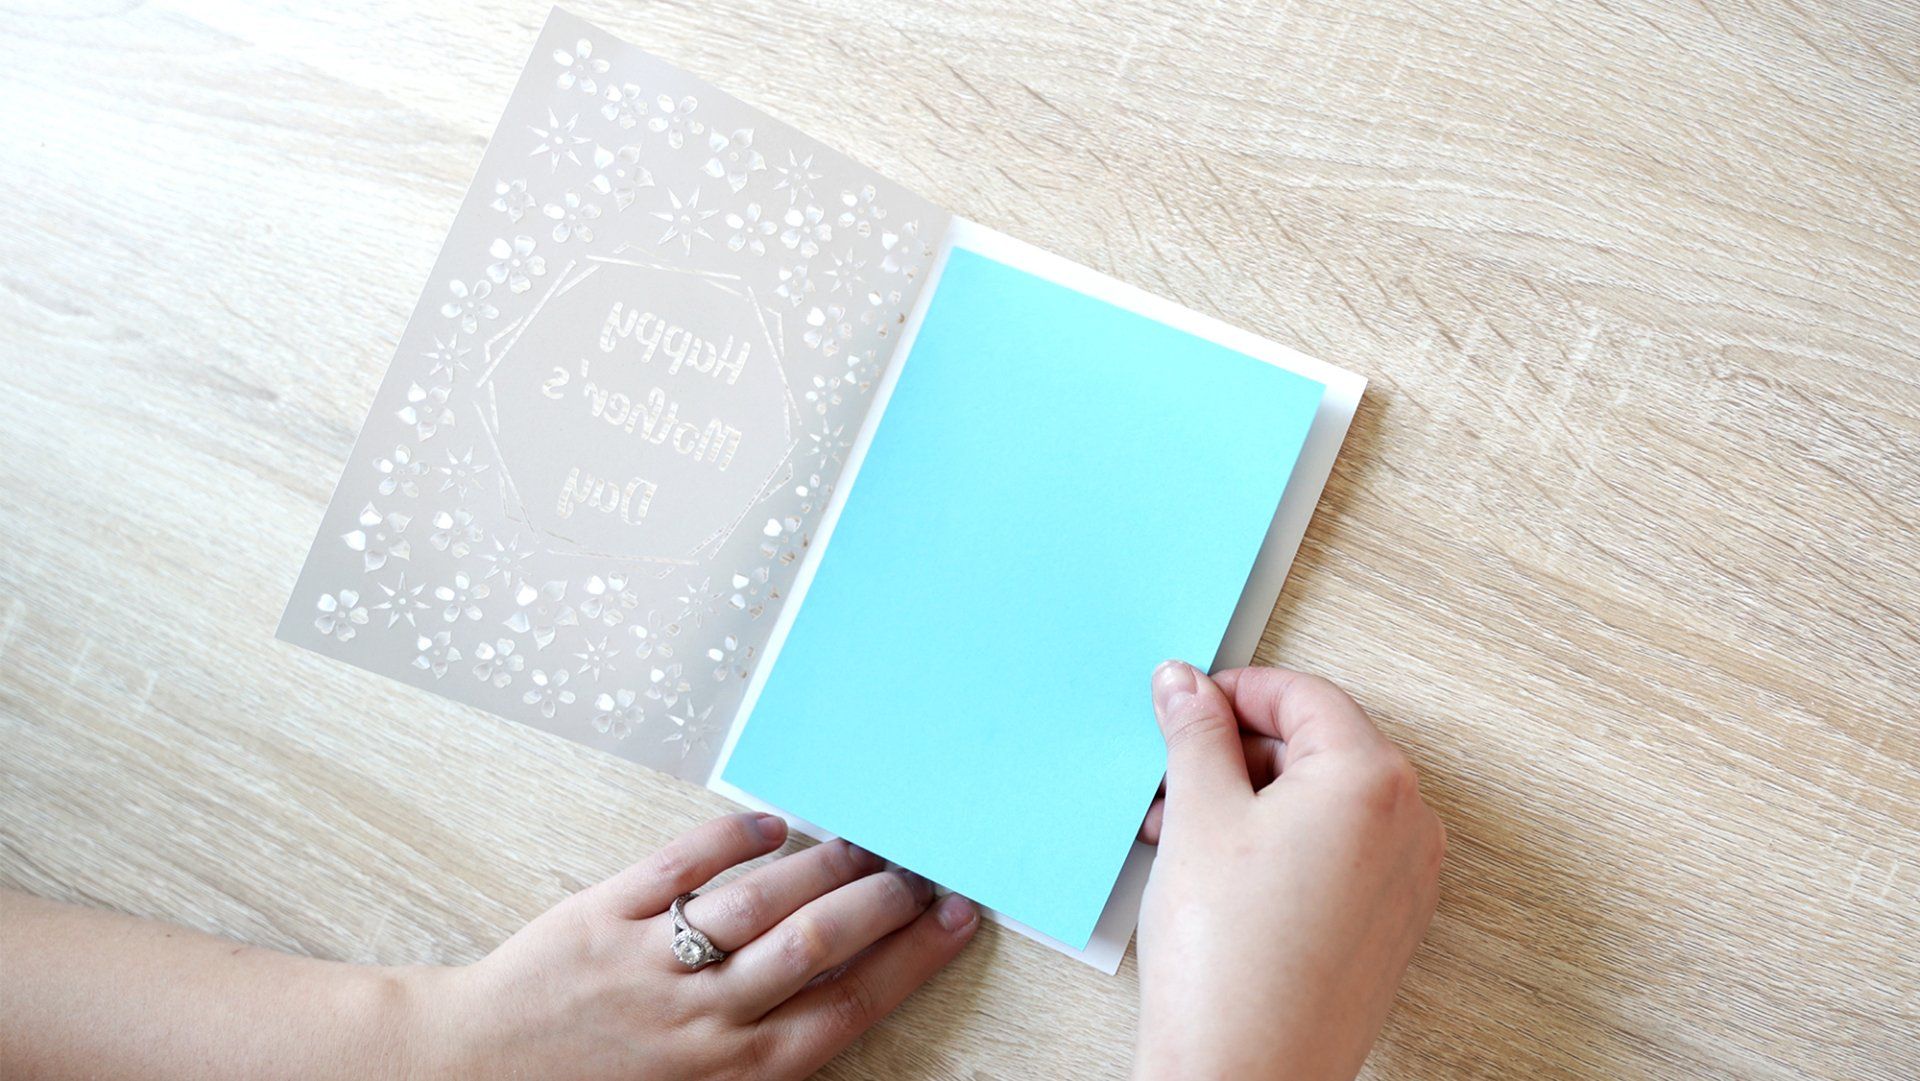
PROJECT COMPLETE!
Now, take a moment to just sit back and stare in awe at your creation because let’s be honest… it’s AMAZING! I’m genuinely so proud of everyone who created this project to completion, I know this project takes a bit of time and a lot of patience with a long cut job and a tedious petal poking process (what a tongue-twister!)
EXTRA kudos to all the beginners out there who saw this advanced-looking project and didn’t get overwhelmed, and stuck it out- that’s hard to do! It’s super easy to get overwhelmed with Cricut projects, especially when dealing with tiny cuts and delicate details, if you ever find yourself struggling or getting frustrated, take a breather and also reach out for help!
I highly encourage everyone to join my Cricut group on Facebook: Any and All Things Cricut because we’re a community of a few thousand strong with such a wide range of skill sets and experience. Feel free to join and ask questions, get help troubleshooting, and also post pix of your latest projects! You spend so much time and effort on projects, I encourage you to show them off!
Stay in touch by following our different social channels, these are the places you can go for more fun tutorials, free SVGs, project ideas, supplies deals, tips, tricks and SO much more fun Cricuty stuff! And as always,
Happy Crafting!

Join our Cricut Community
Join our Cricut community on Facebook by joining our Cricut group: Any and All Things Cricut!
Here, you’re more than welcome to post photos of your latest projects, connect with other crafters, share your new Etsy shop, products, other social media accounts and more.
It’s also a wonderful place to share tips and tricks that you’ve learned along the way in your Cricutting adventures, as well as an excellent resource for troubleshooting any Cricut issues and getting answers to any questions you may have. What better place to get information and connect, than where all the Cricut crafters are!?
Check out the Crafting Spree blog for more DIY, Crafting & Cricut Resources:

Share this article with your friends & family.